How to Refashion an Old Sweater Into a Cropped Cardigan Set

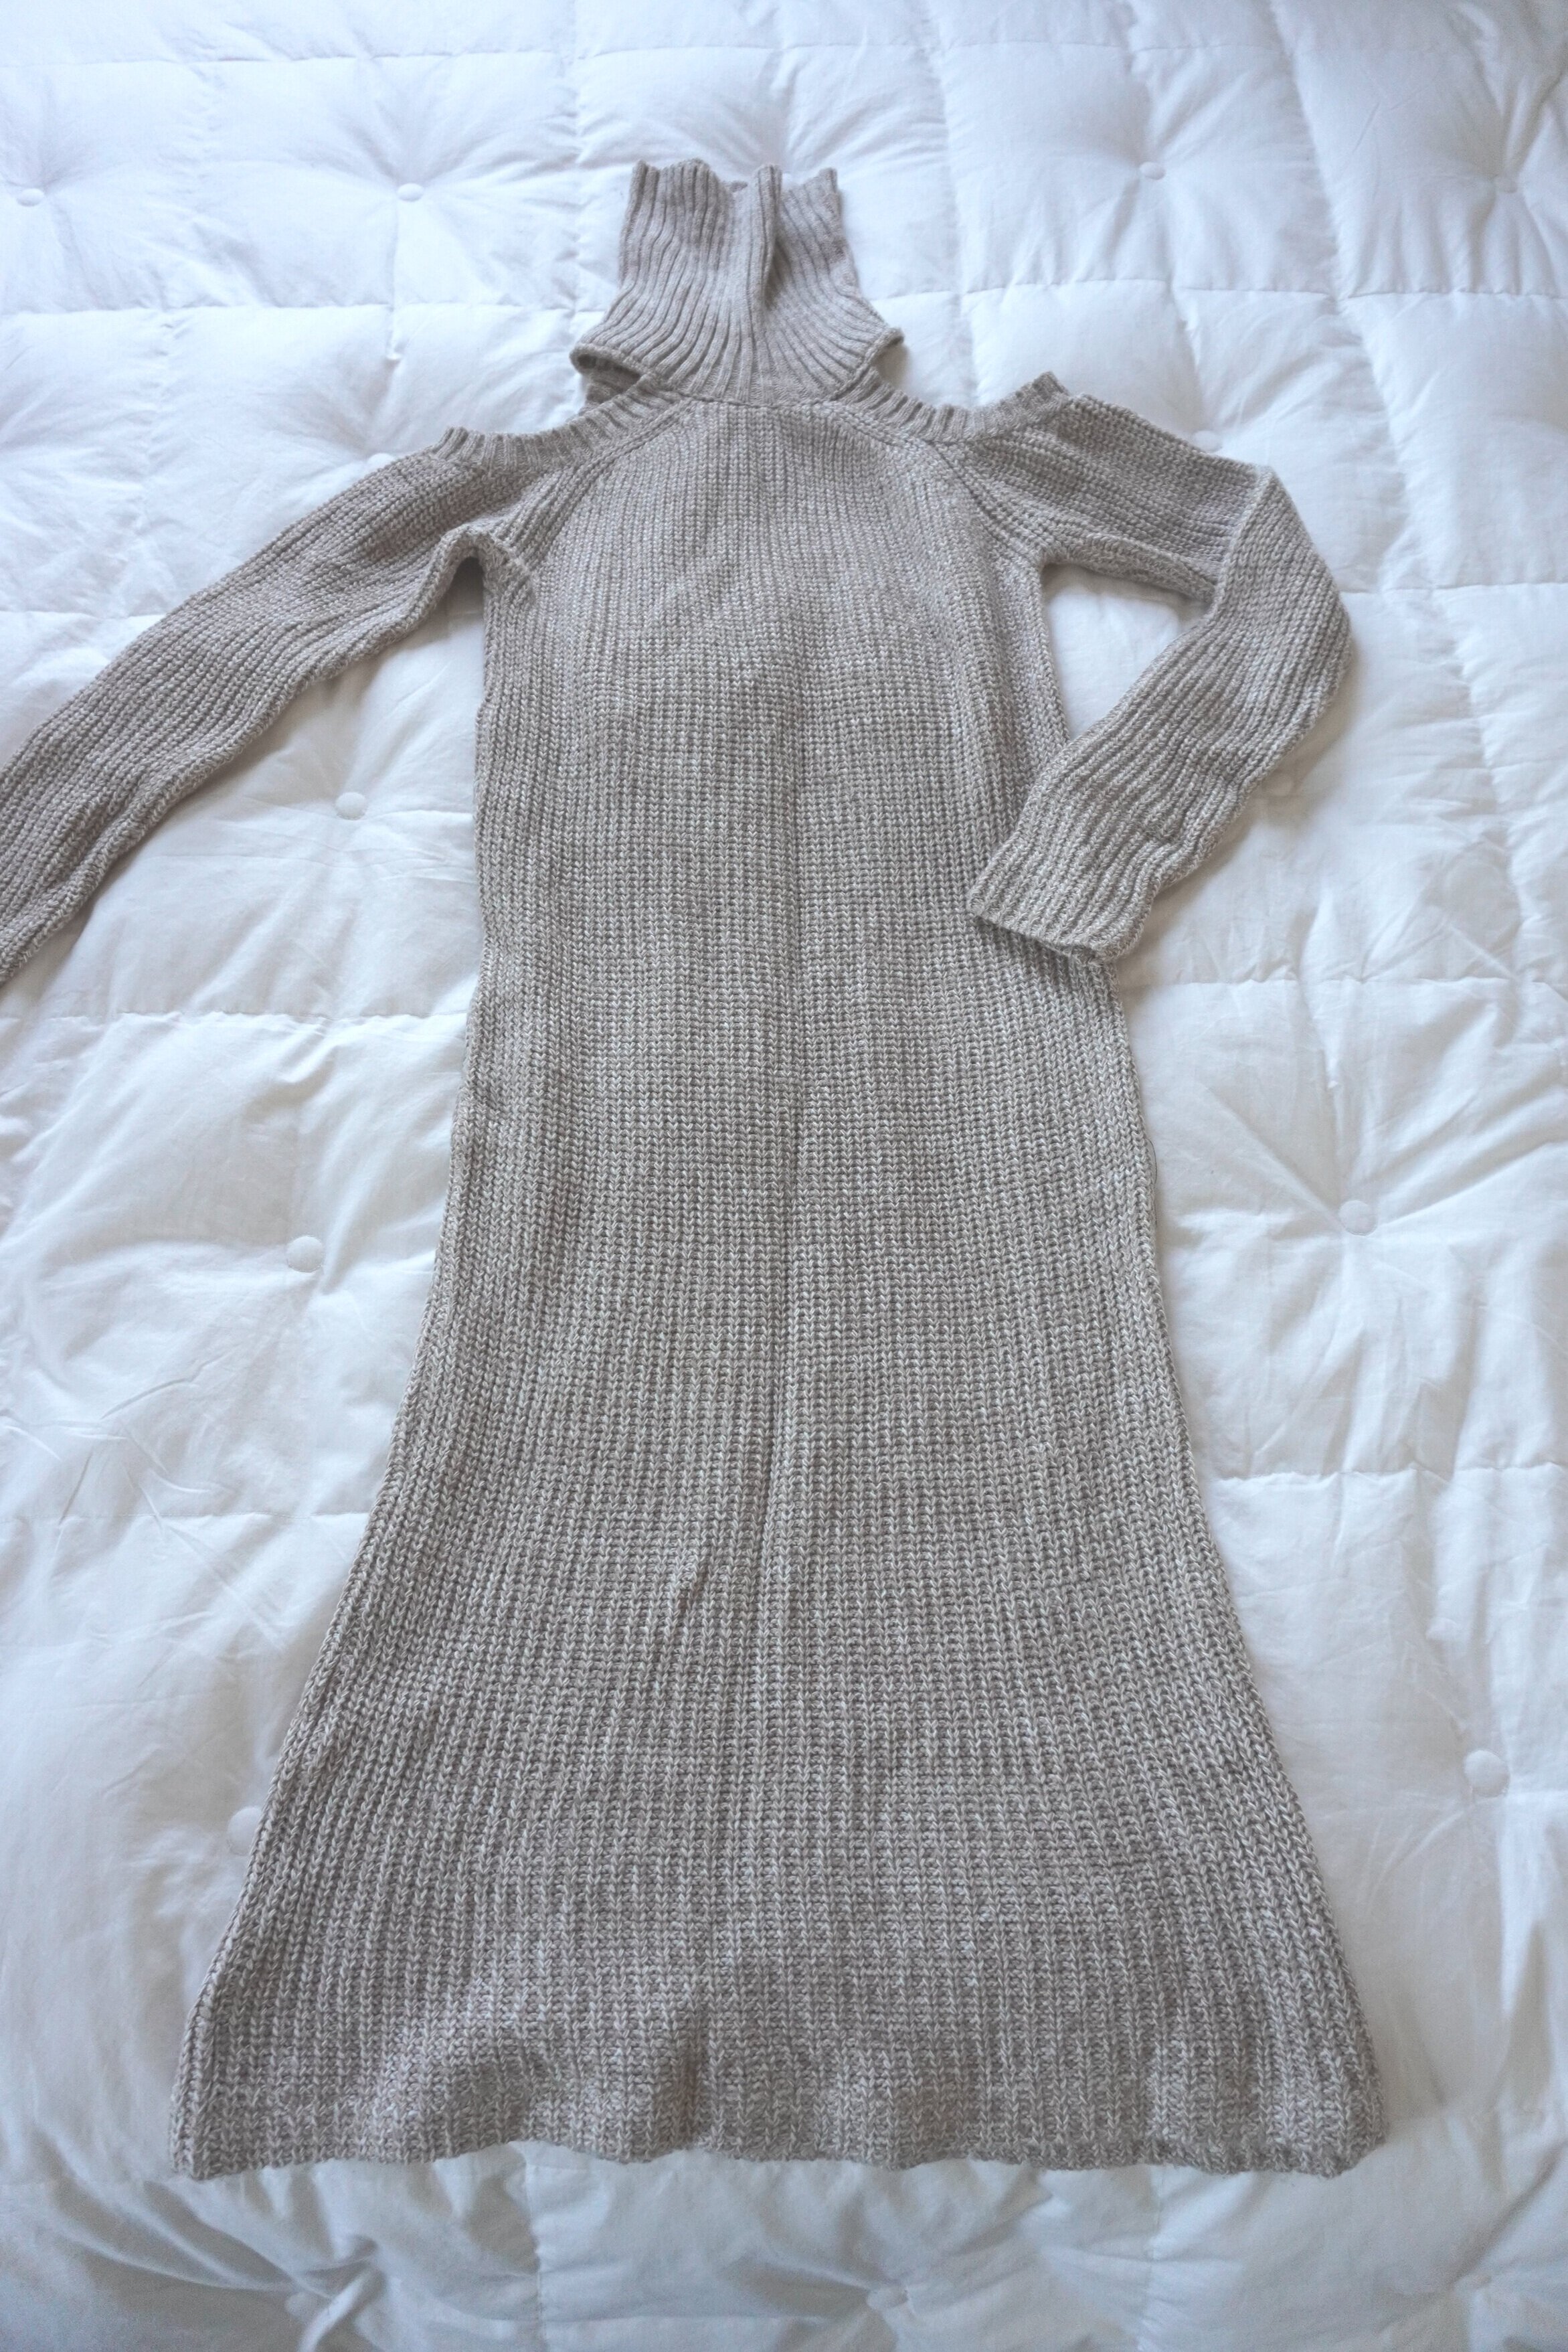
If you’re like me, you probably have a closet full of old clothes that you no longer wear. Obviously, you can always donate those clothes to Goodwill or the Salvation Army, but I like to refashion them into fresh new (on-trend) pieces. Take for example this old sweater dress:

DSC01914.jpg

The sweater dress had all the raw ingredients for a great transformation - the fabric was in good condition and it had some nice chunky ribbing which would give great texture to the new garment. Plus, it was a midi length dress, which gave me lots of fabric to play with.

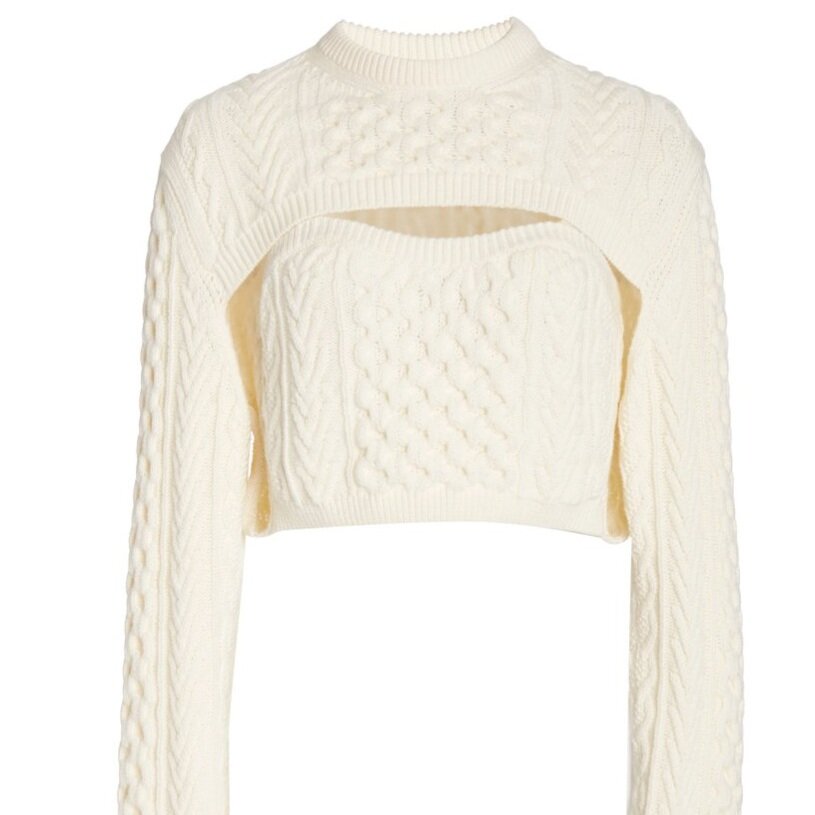
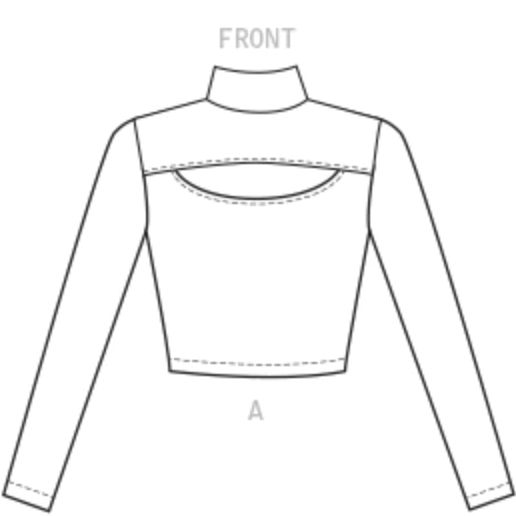
I decided to transform this old sweater dress into a trendy cropped cardigan set. About two weeks ago, I posted about a Rosie Assoulin cropped cardigan set that I fell head over heels in love with, and how I thought McCall’s 8003 could be adapted to make a DIY version.

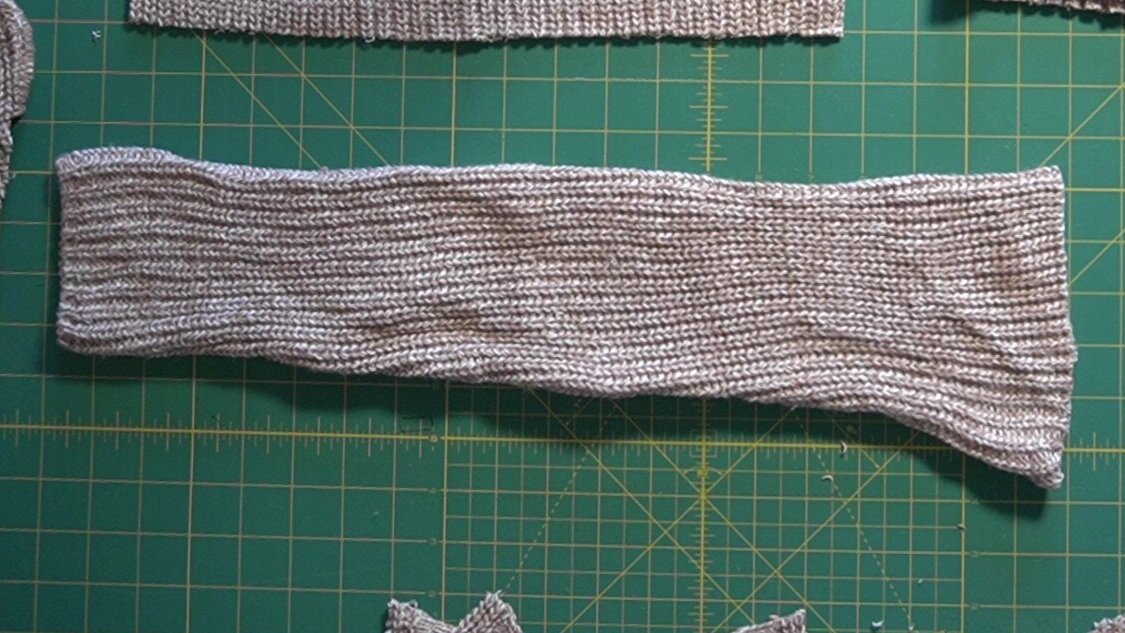
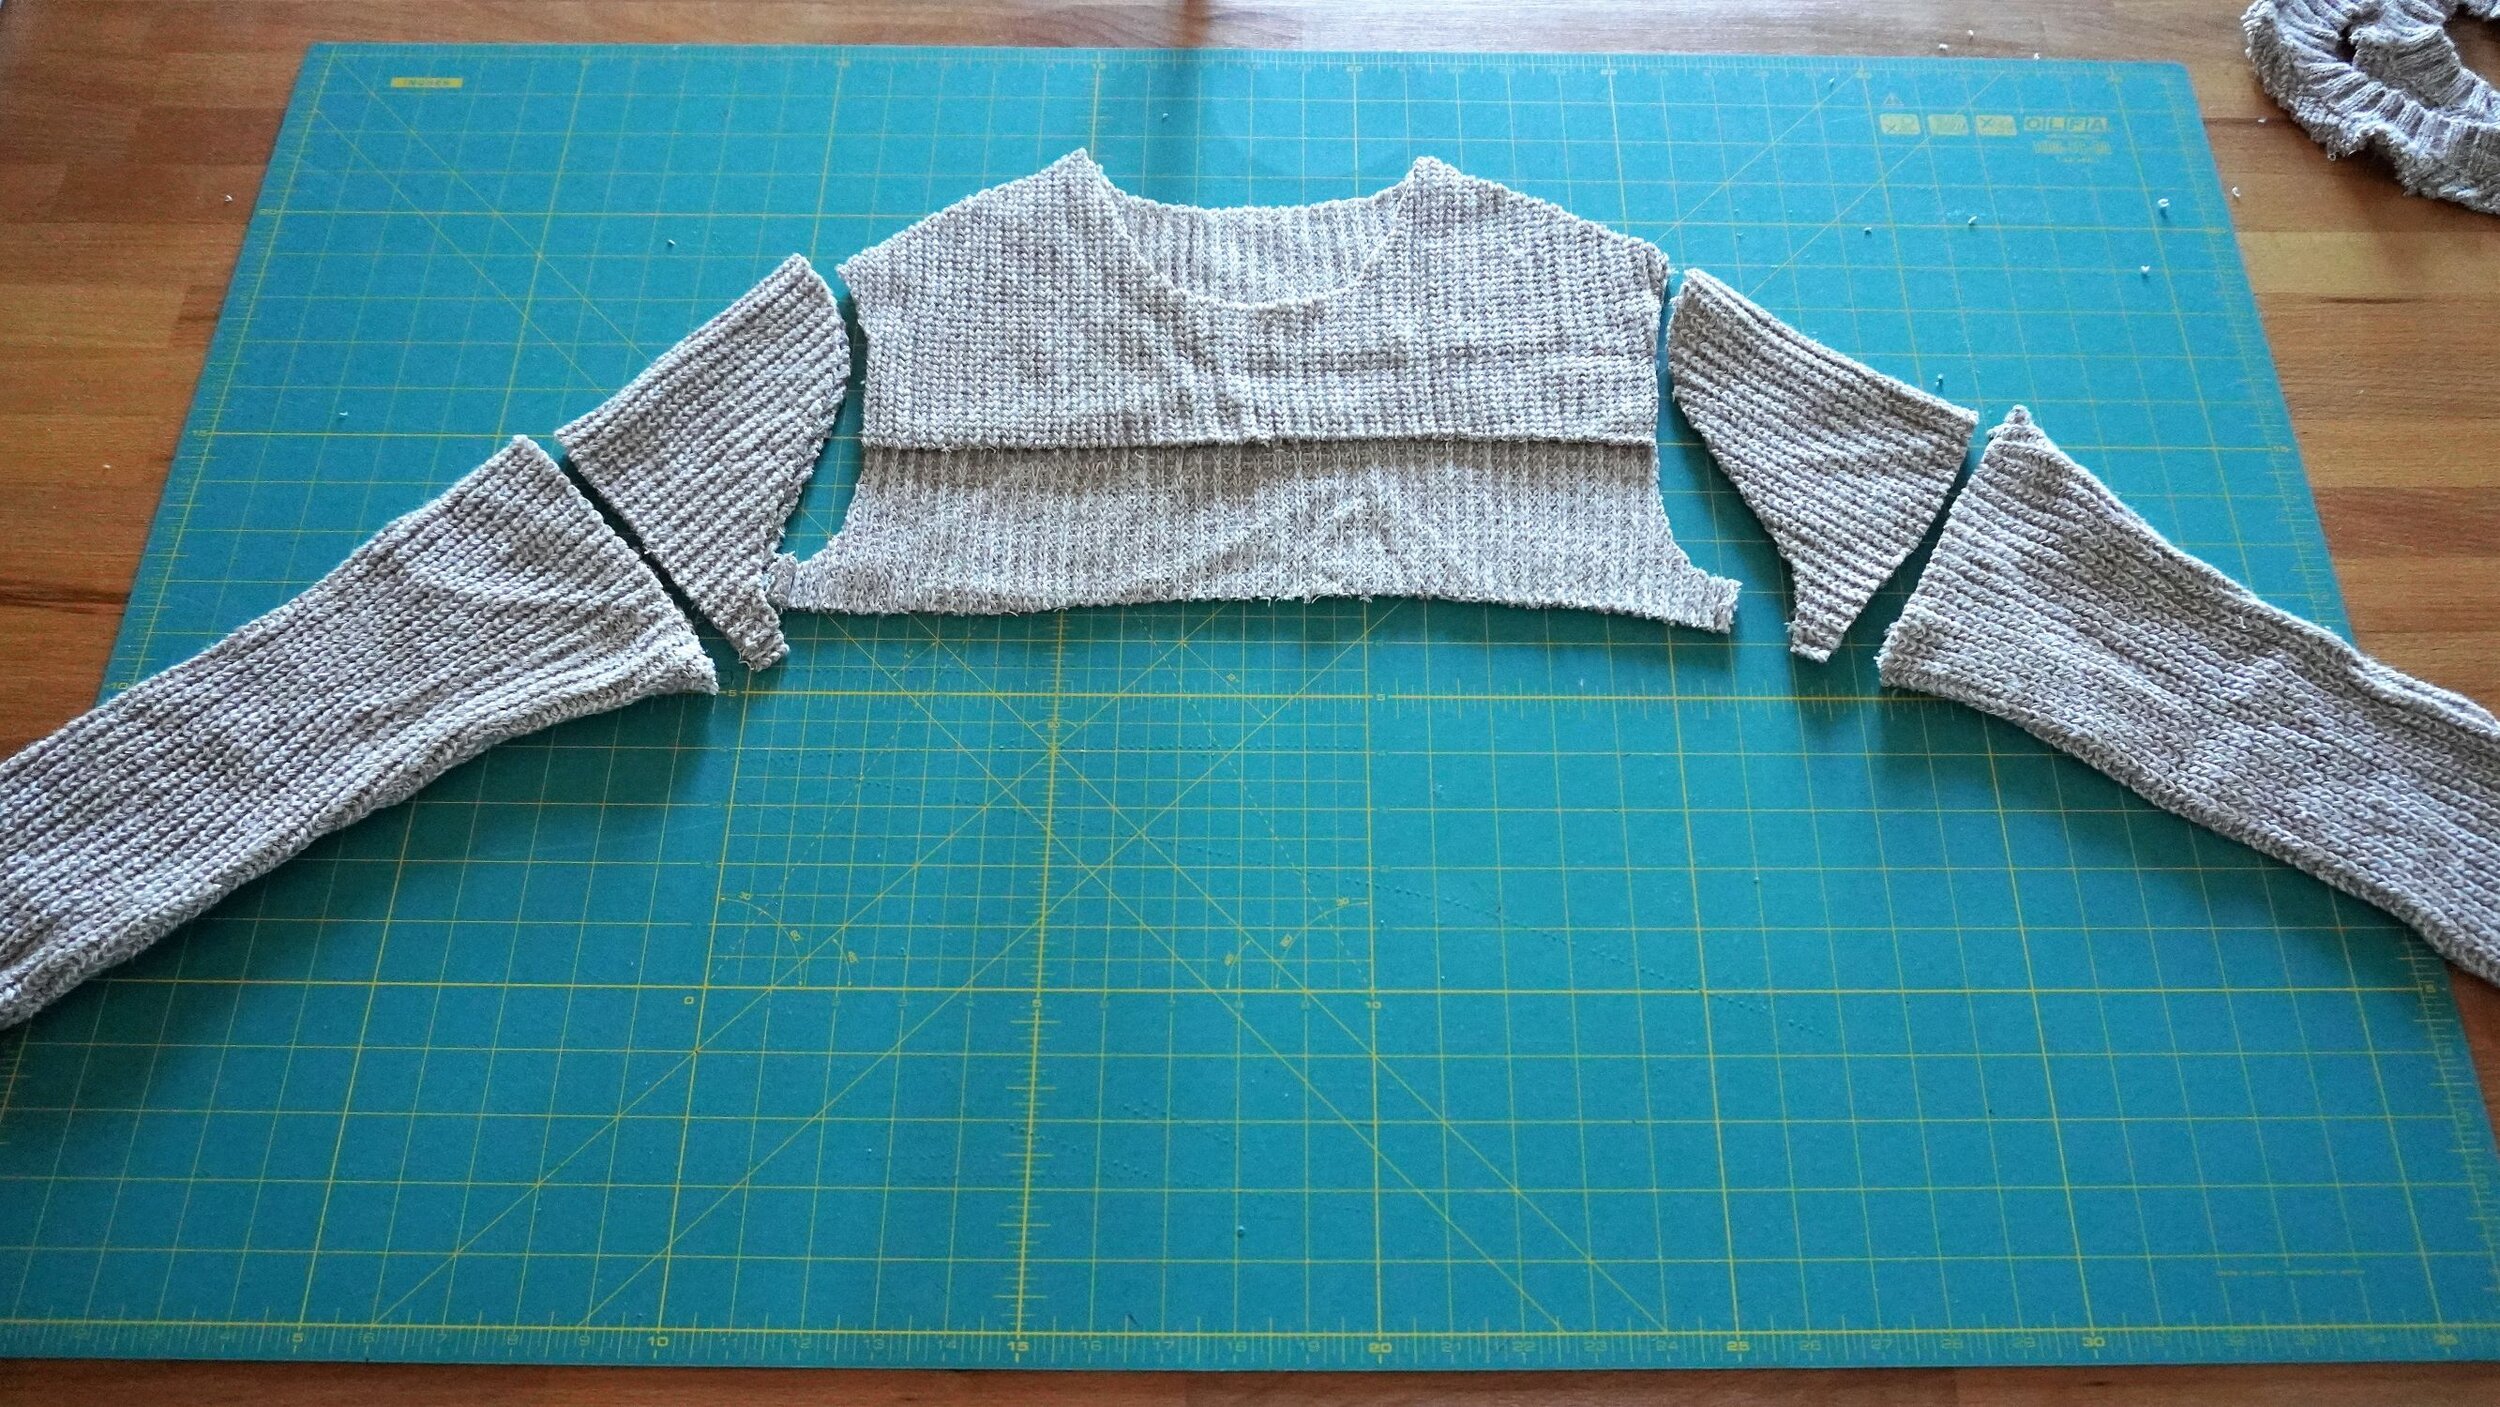
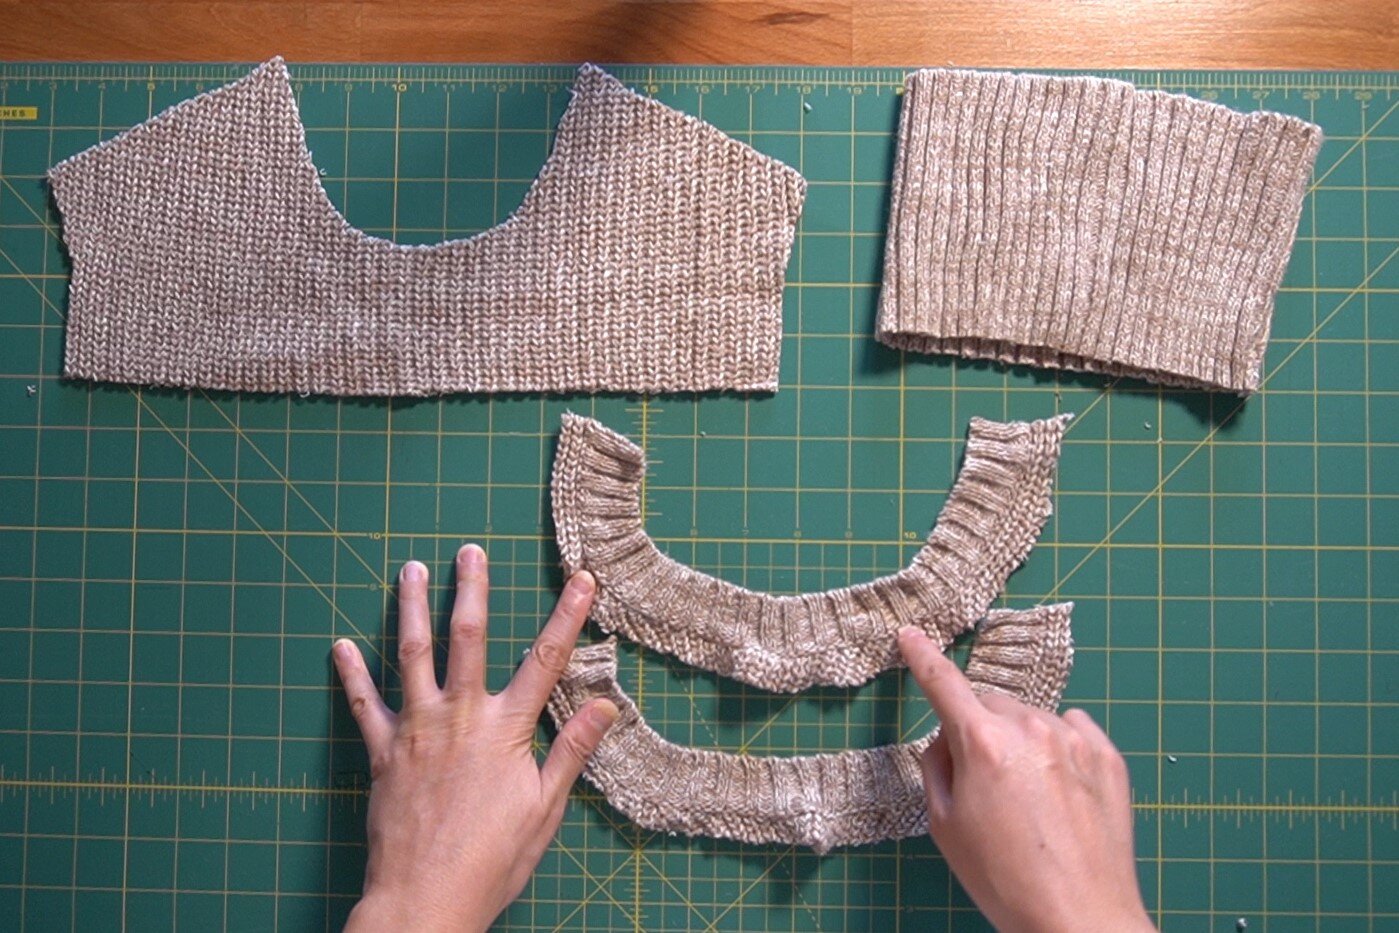
Using my old sweater dress, I played around with different cutting layouts and found that I could (just barely!) squeeze all of the pieces out of the dress. As I usually do when refashioning a garment, I tried to use or save features in the existing garment where possible:

  • I cut the tank top bodice pieces along the bottom hem of the original dress, to save myself the trouble of having to hem those pieces later on.

  • I salvaged the ribbed collar.

  • I salvaged the curved ribbing.

  • I used most of the original sleeve.

I cut View A, size 10 in the pattern and followed all of the pieces exactly as marked, with three exceptions:

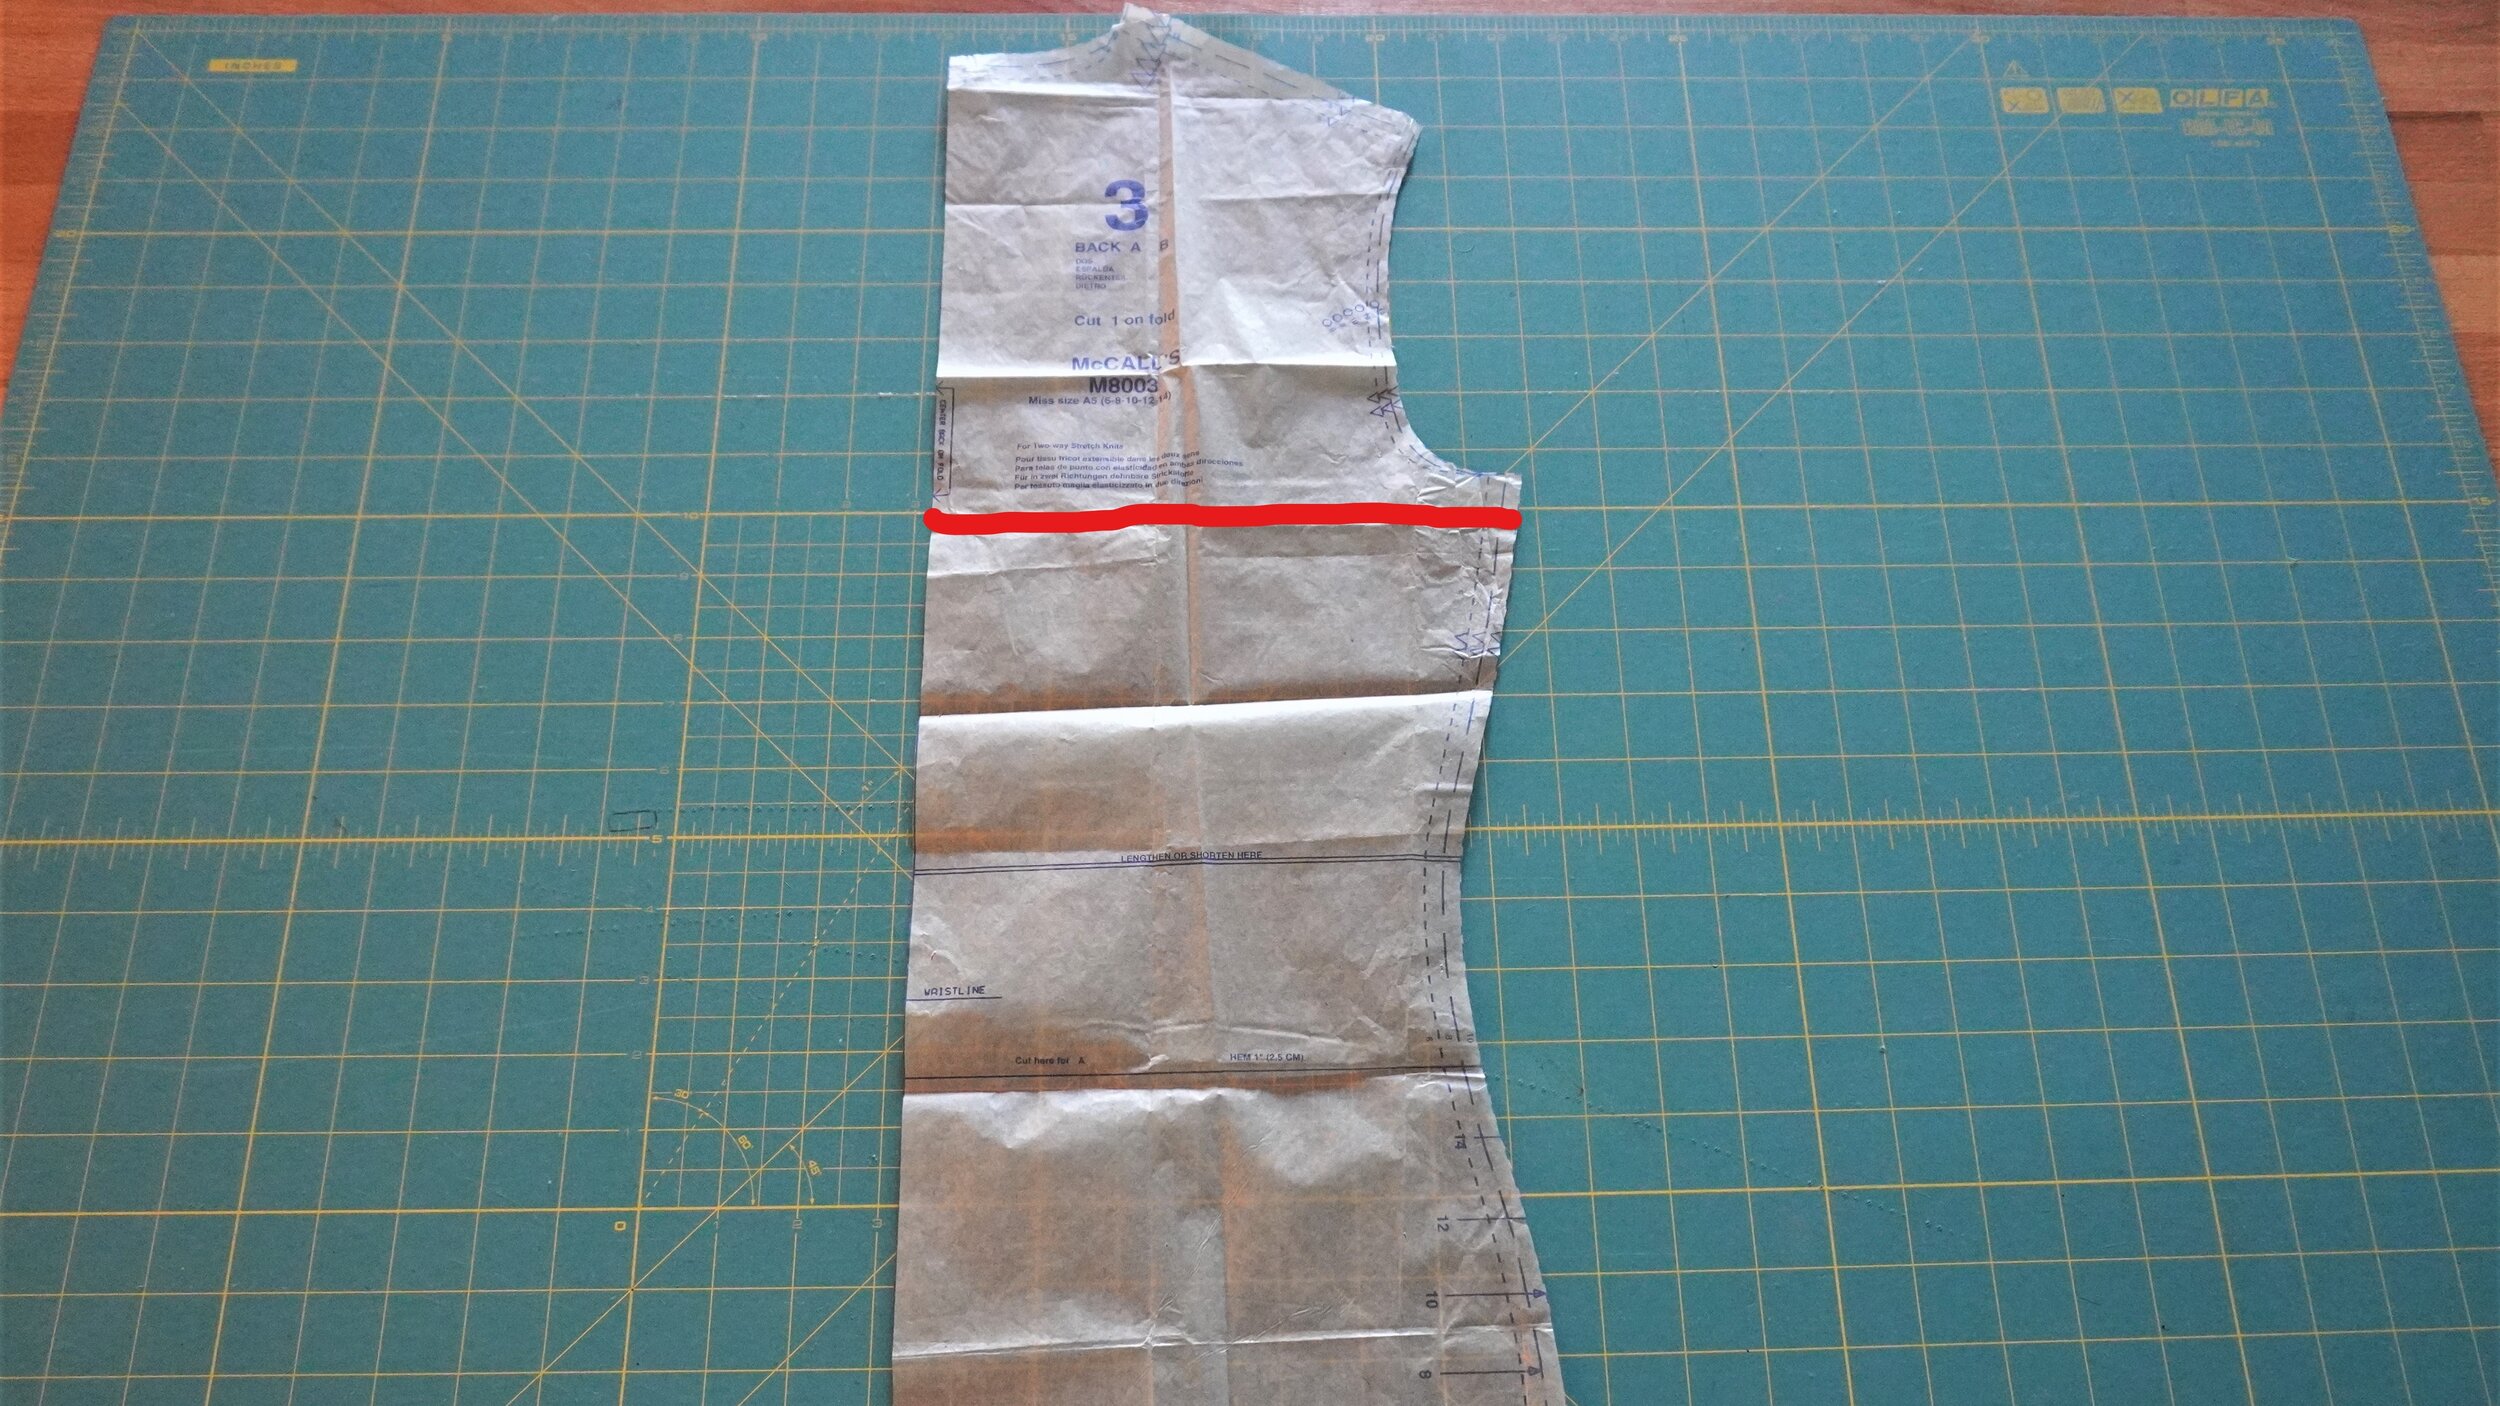
  • I cut a back bodice piece for the cropped cardigan using the back bodice piece from the original pattern. I chopped off the back bodice piece 5/8 inch below the armhole. (See picture below)

  • I did not cut out the collar according to the pattern, as I did not want a stand collar. Instead, I planned to use the curved ribbing I salvaged from the shoulder cutouts of the original sweater dress.

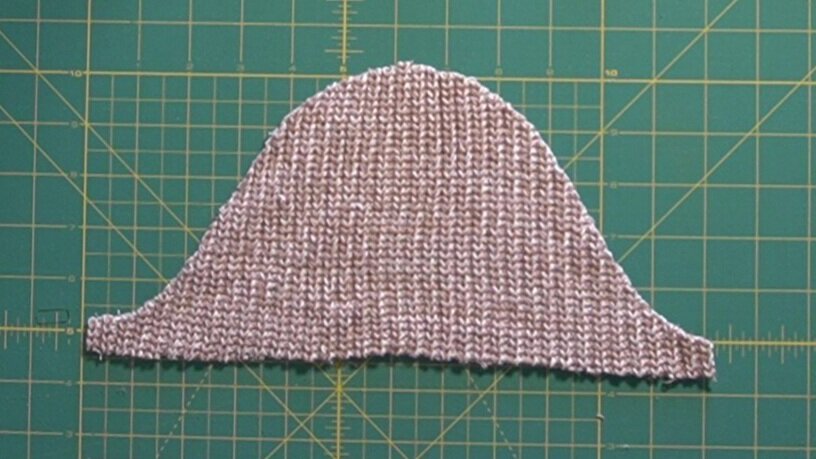
  • I cut out sleeve caps using the top part of the sleeve pattern. As noted above, I salvaged the original sleeve but the sleeve did not have a sleeve cap (because the original sweater dress had a cold shoulder cutout), so I had to cut extra sleeve caps from the rest of the dress. (See pictures below)
The first part of the project was pretty straightforward - I had to sew together the front and back of the tank top at the side and shoulder seams. For this project, I really wanted to use my regular sewing machine instead of my serger, just to prove that it is in fact possible to sew knits without a serger. I used my zigzag stitch with the stitch width set to 5 and the stitch length set to 1.5. (Tip: remember that the lines on the plate of our sewing machine indicate distance from the sewing machine needle when it is in the center position. The needle won’t be in the center position when you are using a zig zag stitch, so be sure to measure the distance from the needle when it is in the left position, and set your seam guide according to that distance.)

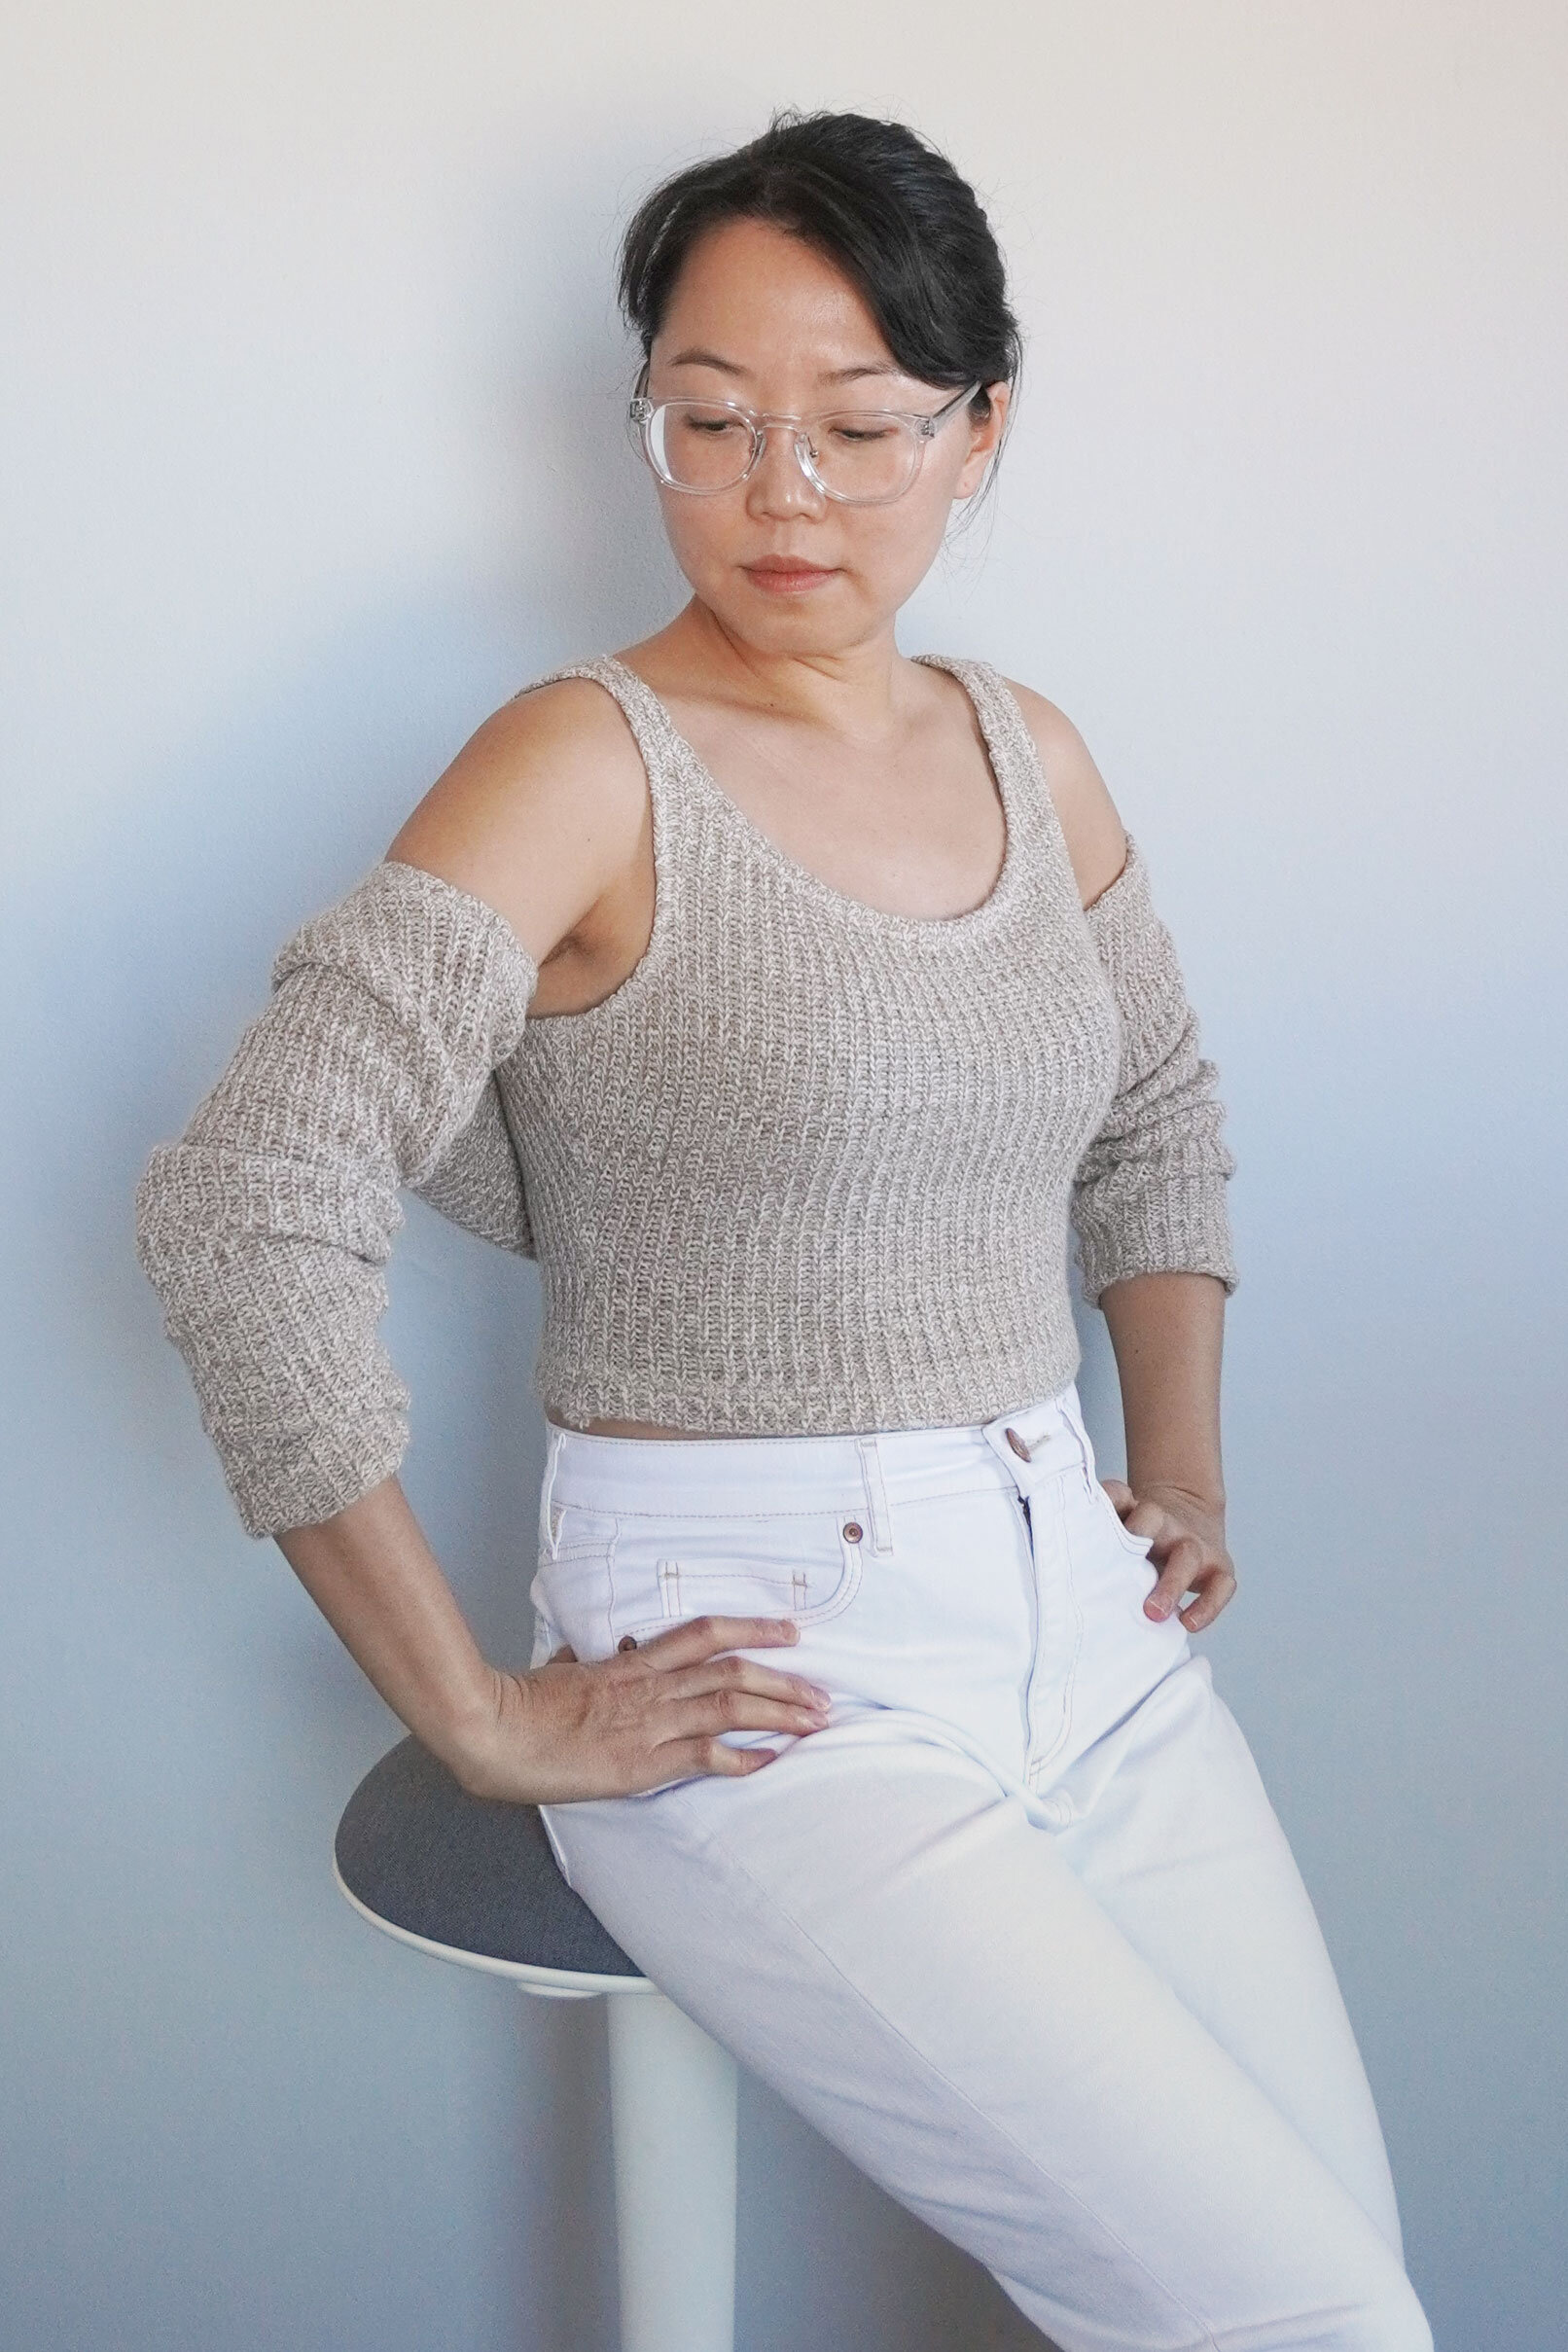
Once the shoulder and side seams were sewn, I trimmed the back neckline to blend in with the neckline in front. I also cut the armholes in a bit, to narrow the width of the shoulder strap to more closely approximate the look of the inspo garment and lower the bottom of the armhole a bit. The original pattern draft had a tight armhole because the bodice was supposed to connect to the sleeves, but that no longer made sense now that we were making two separate pieces. After trying the tank top on, I decided that the top was too constricting so I decided to lower the armholes to make the top more comfortable to wear.

C0103_Moment_LI with new neckline (3).jpg

The next step was to finish the neckline and armholes. My favorite way to finish the edges of knit fabrics is to sew clear elastic to the edge (taking care not to stretch the fabric), then turn the elastic over to the inside of the garment and stitch the edge in place. This gives me a clean finish every time and it also ensures that the seam will not stretch over time. (Check out the video below if you want to see what I’m talking about.) If you find that your edge is wavy or ruffled or not sitting smoothly, hover your iron over the edge and apply lots of steam - the steam will shrink the fabric and get your edge to lay flat again. Trust me, it really is magic - I frequently find that I have wavy edges when I first finish stitching the edge, but applying steam fixes the problem instantly.

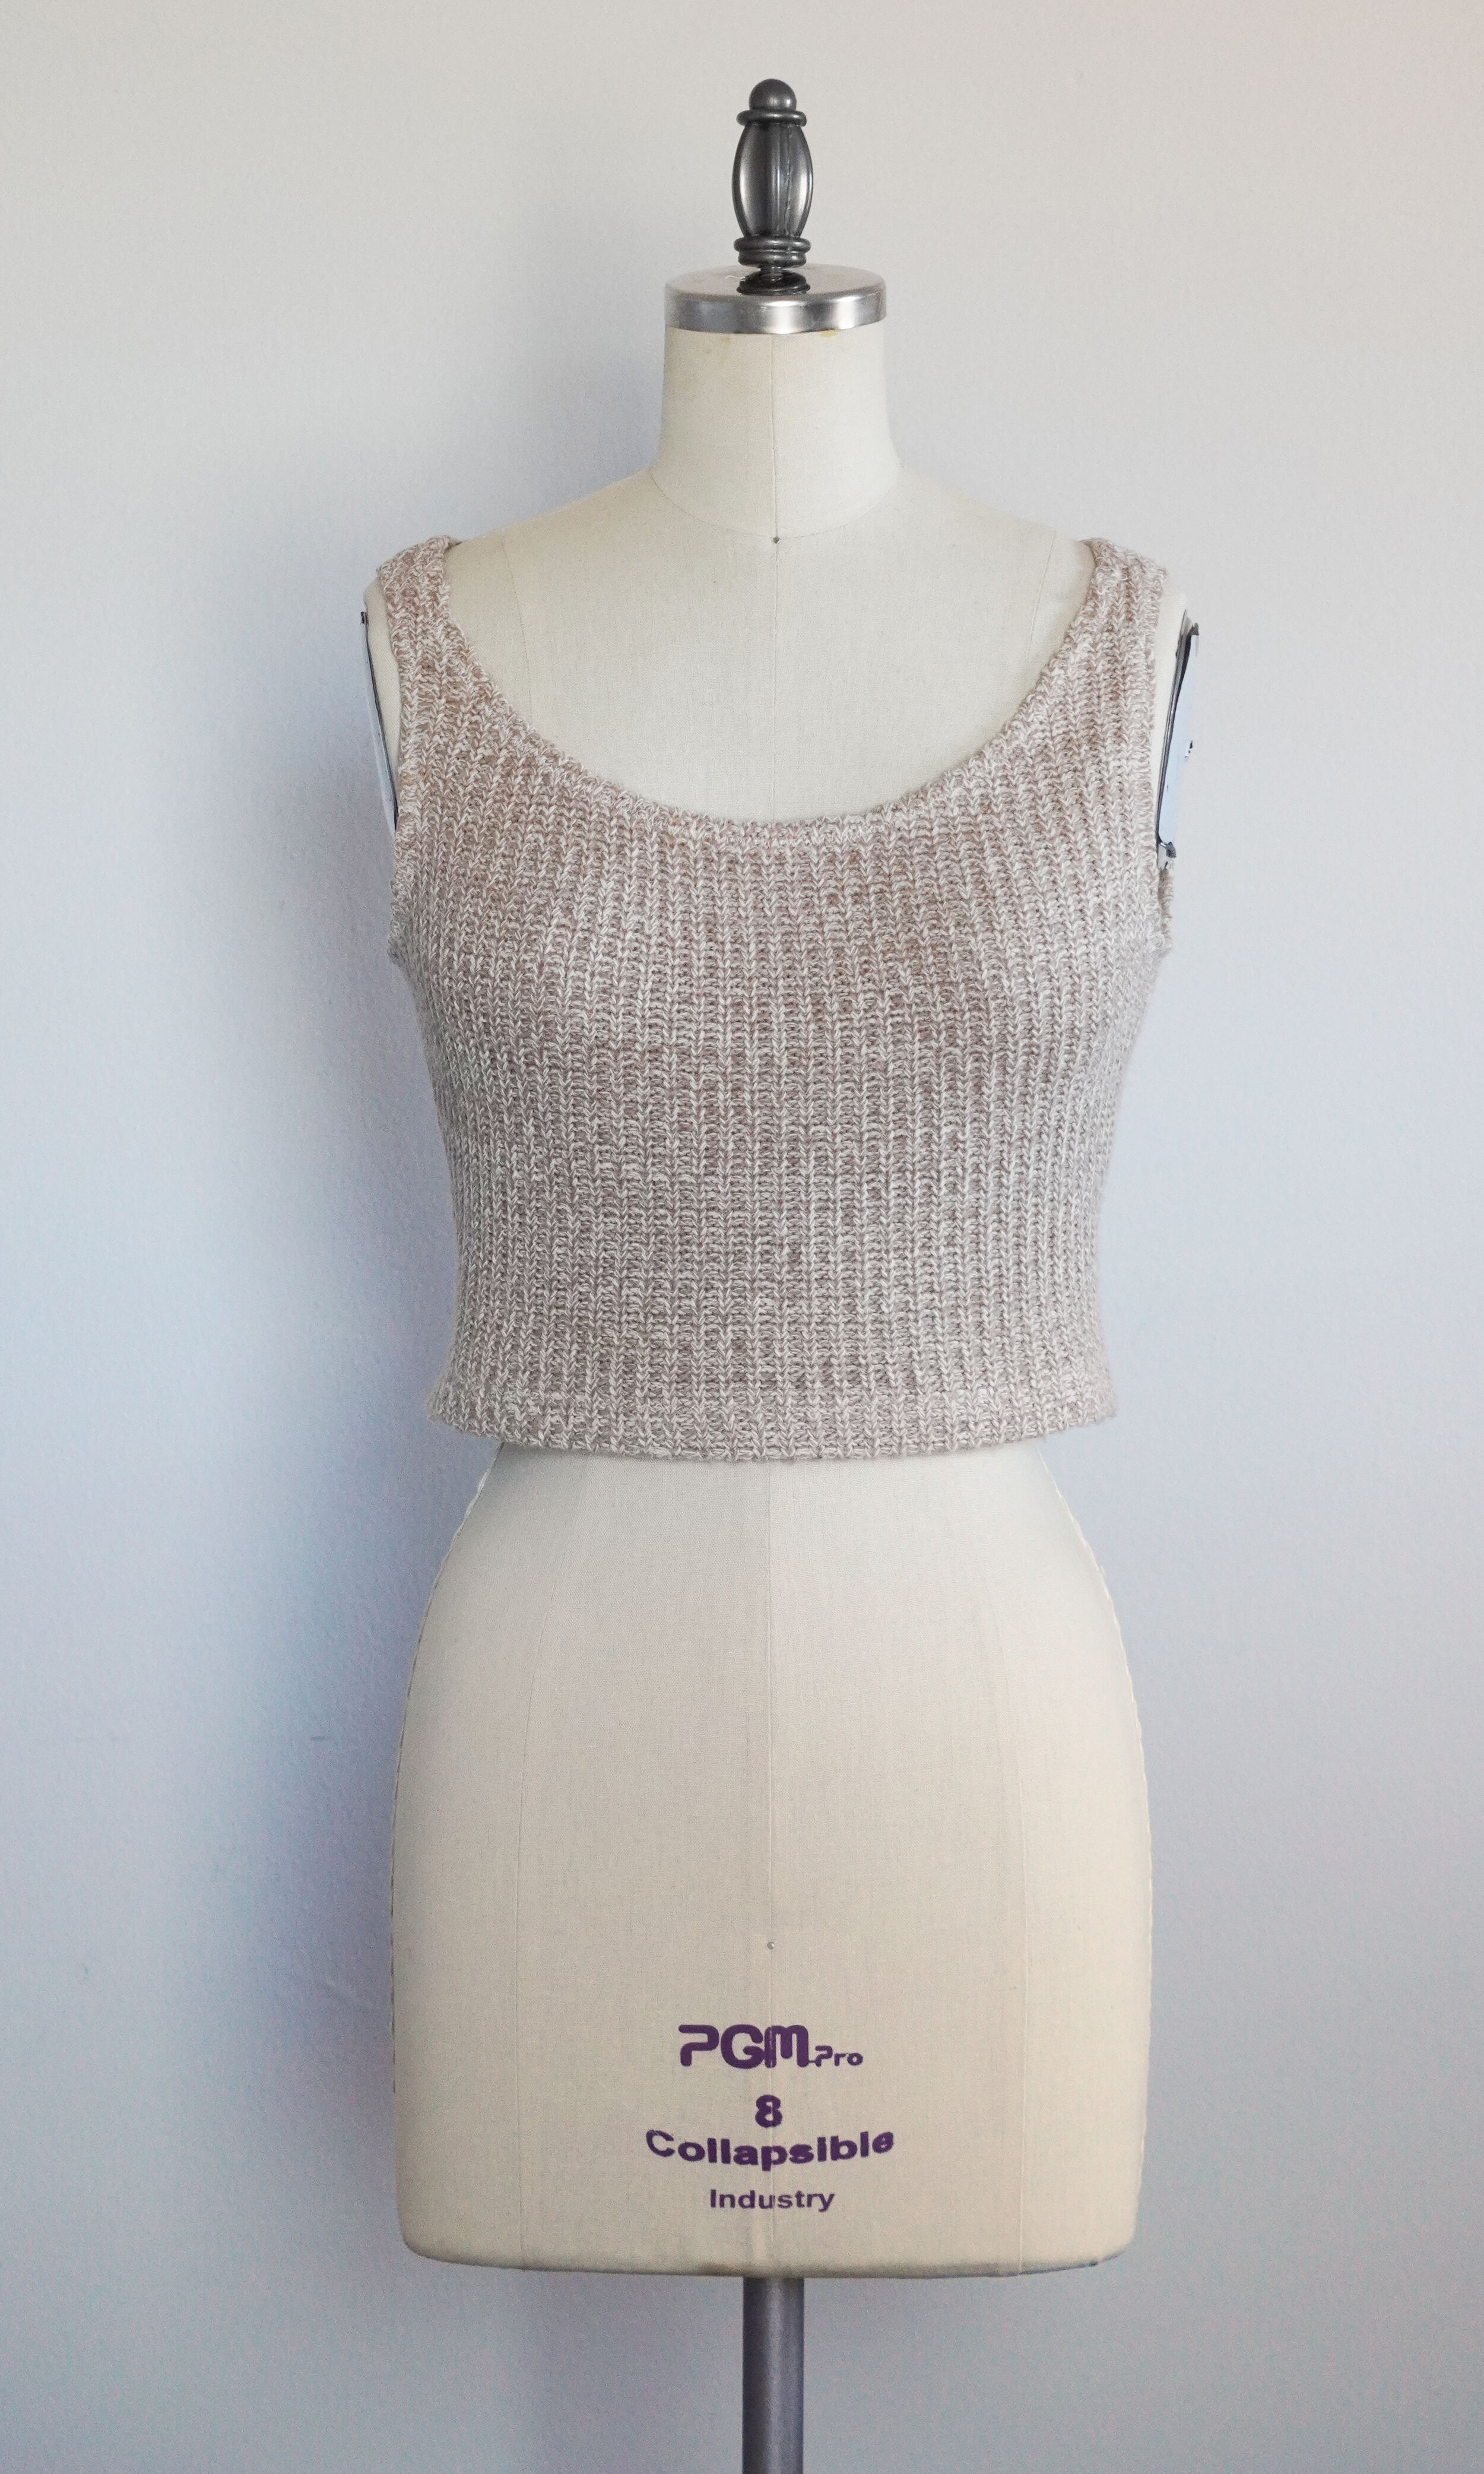
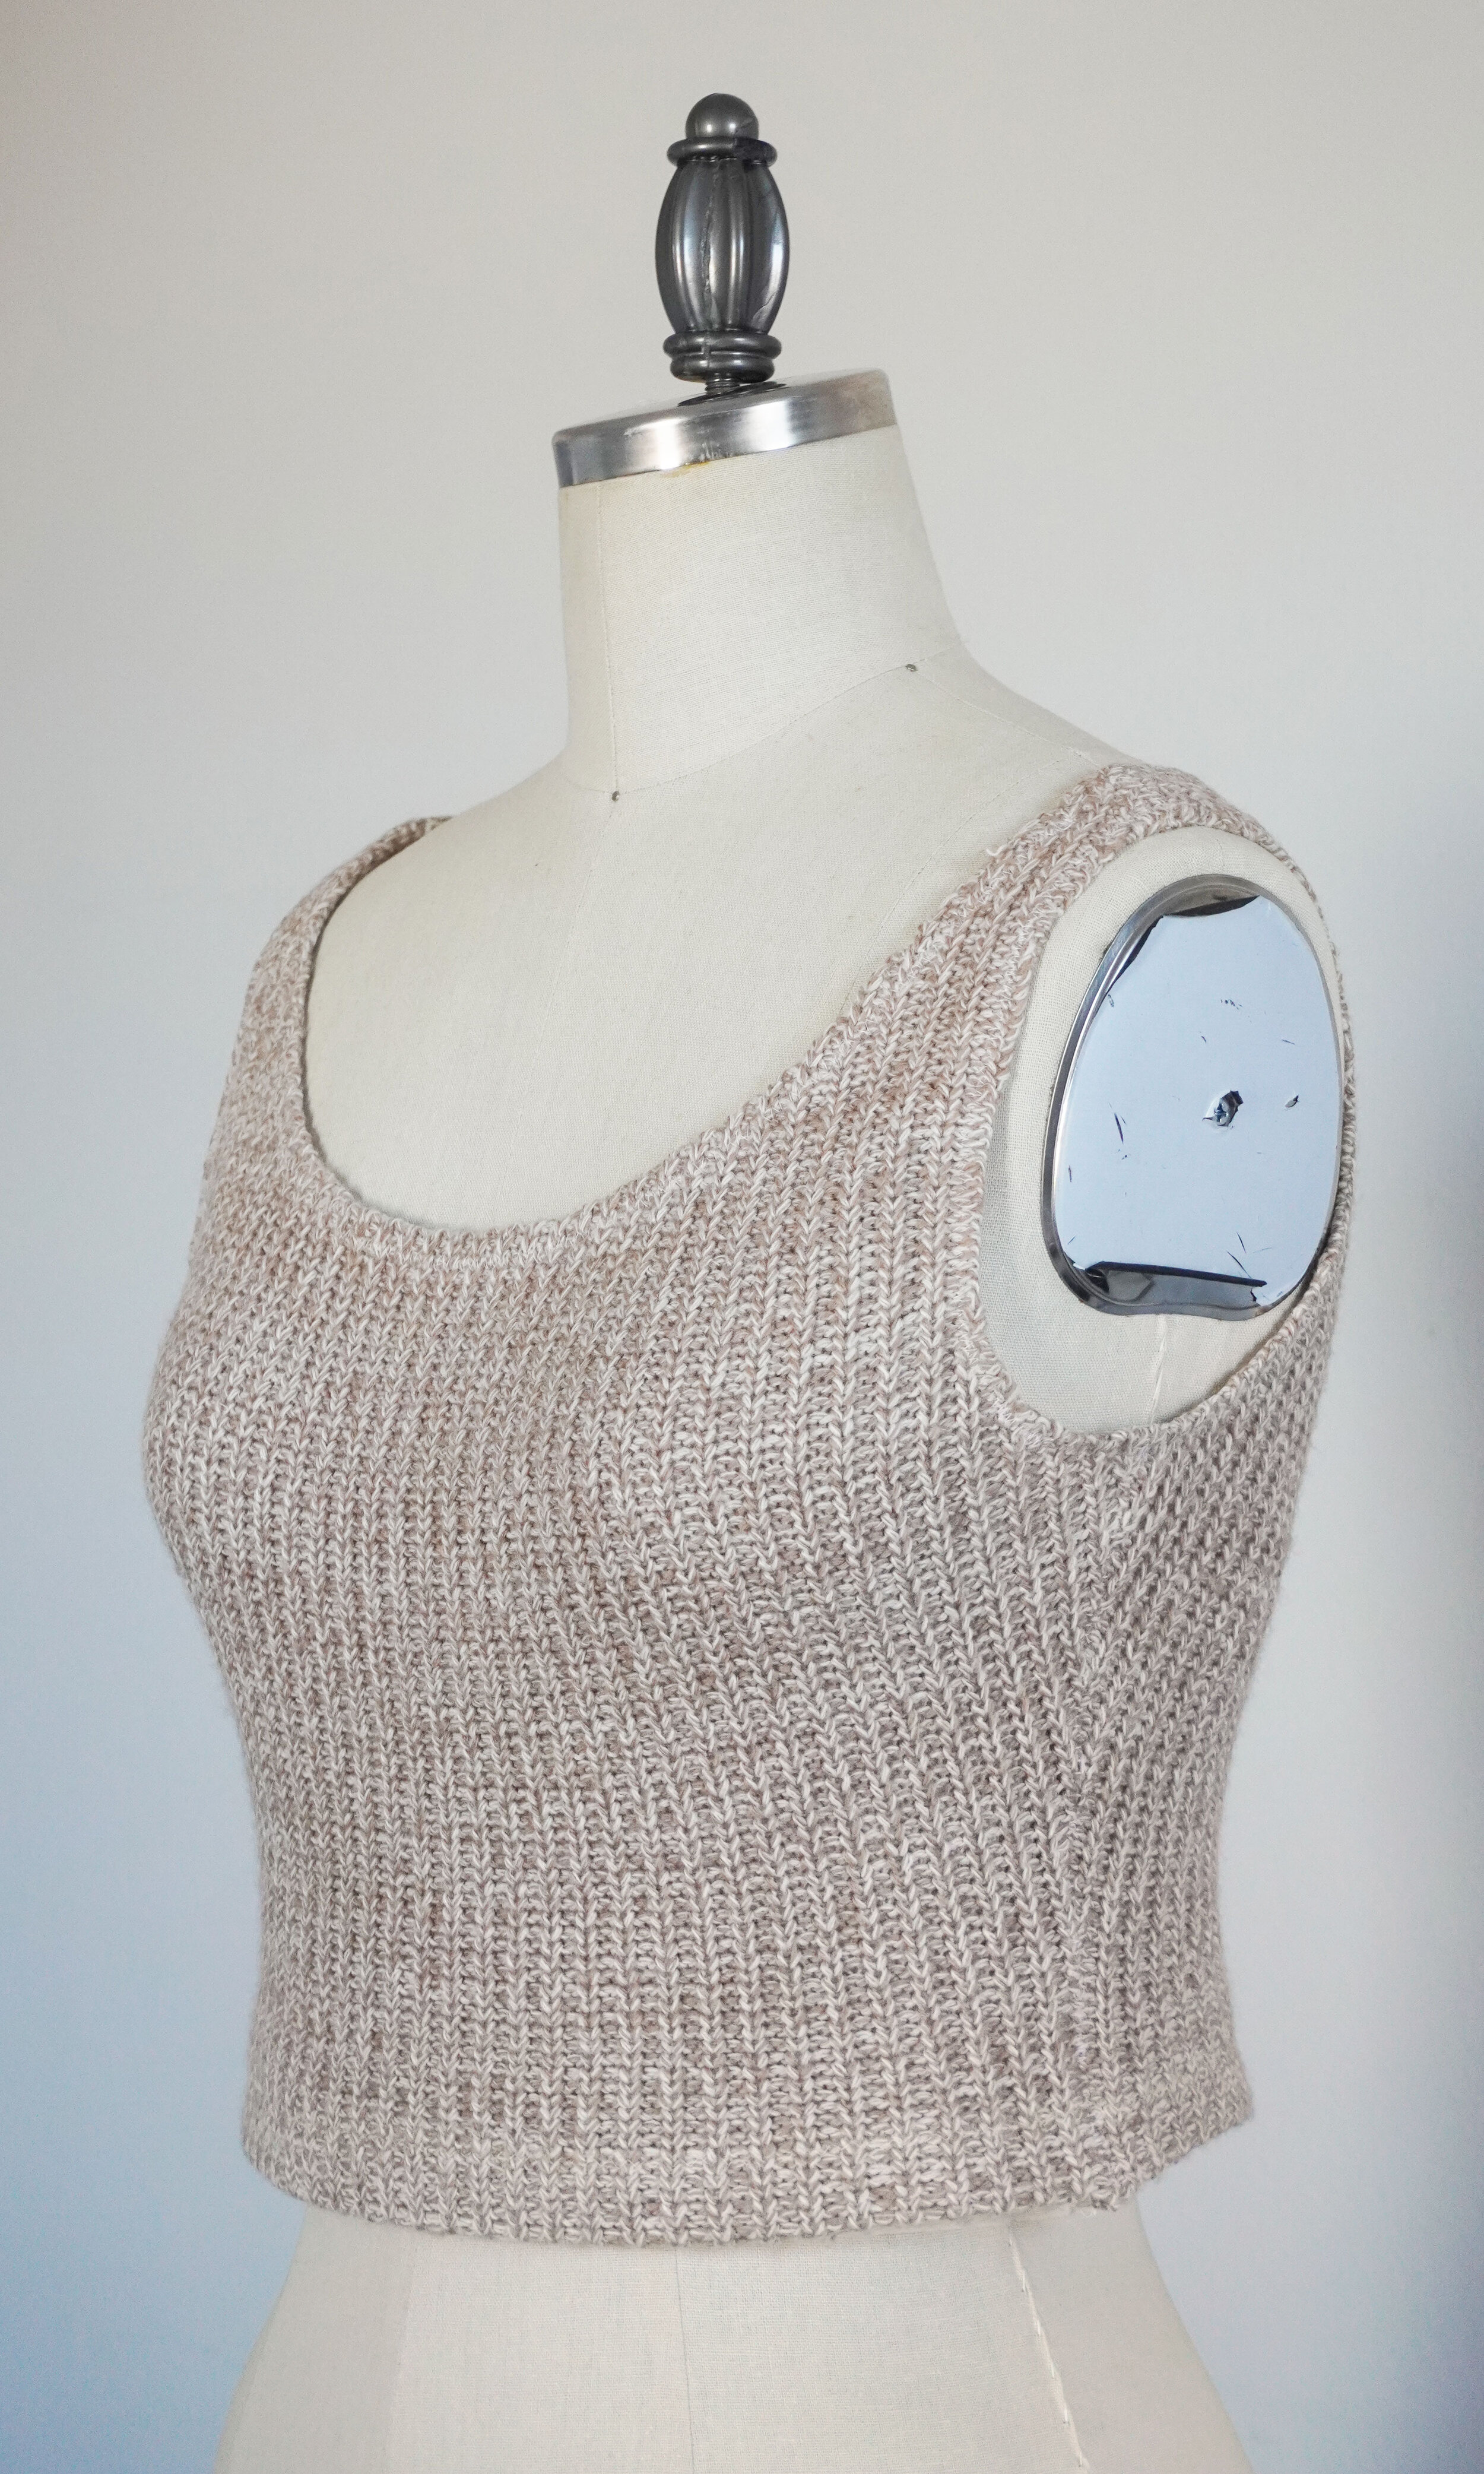
With that, the tank top was done (note that I didn’t have to finish the bottom hem because I used the existing hem from the original garment - hooray for time savers!). It was now time to move on to the cropped cardigan/shrug.

DSC01922 (3).JPG

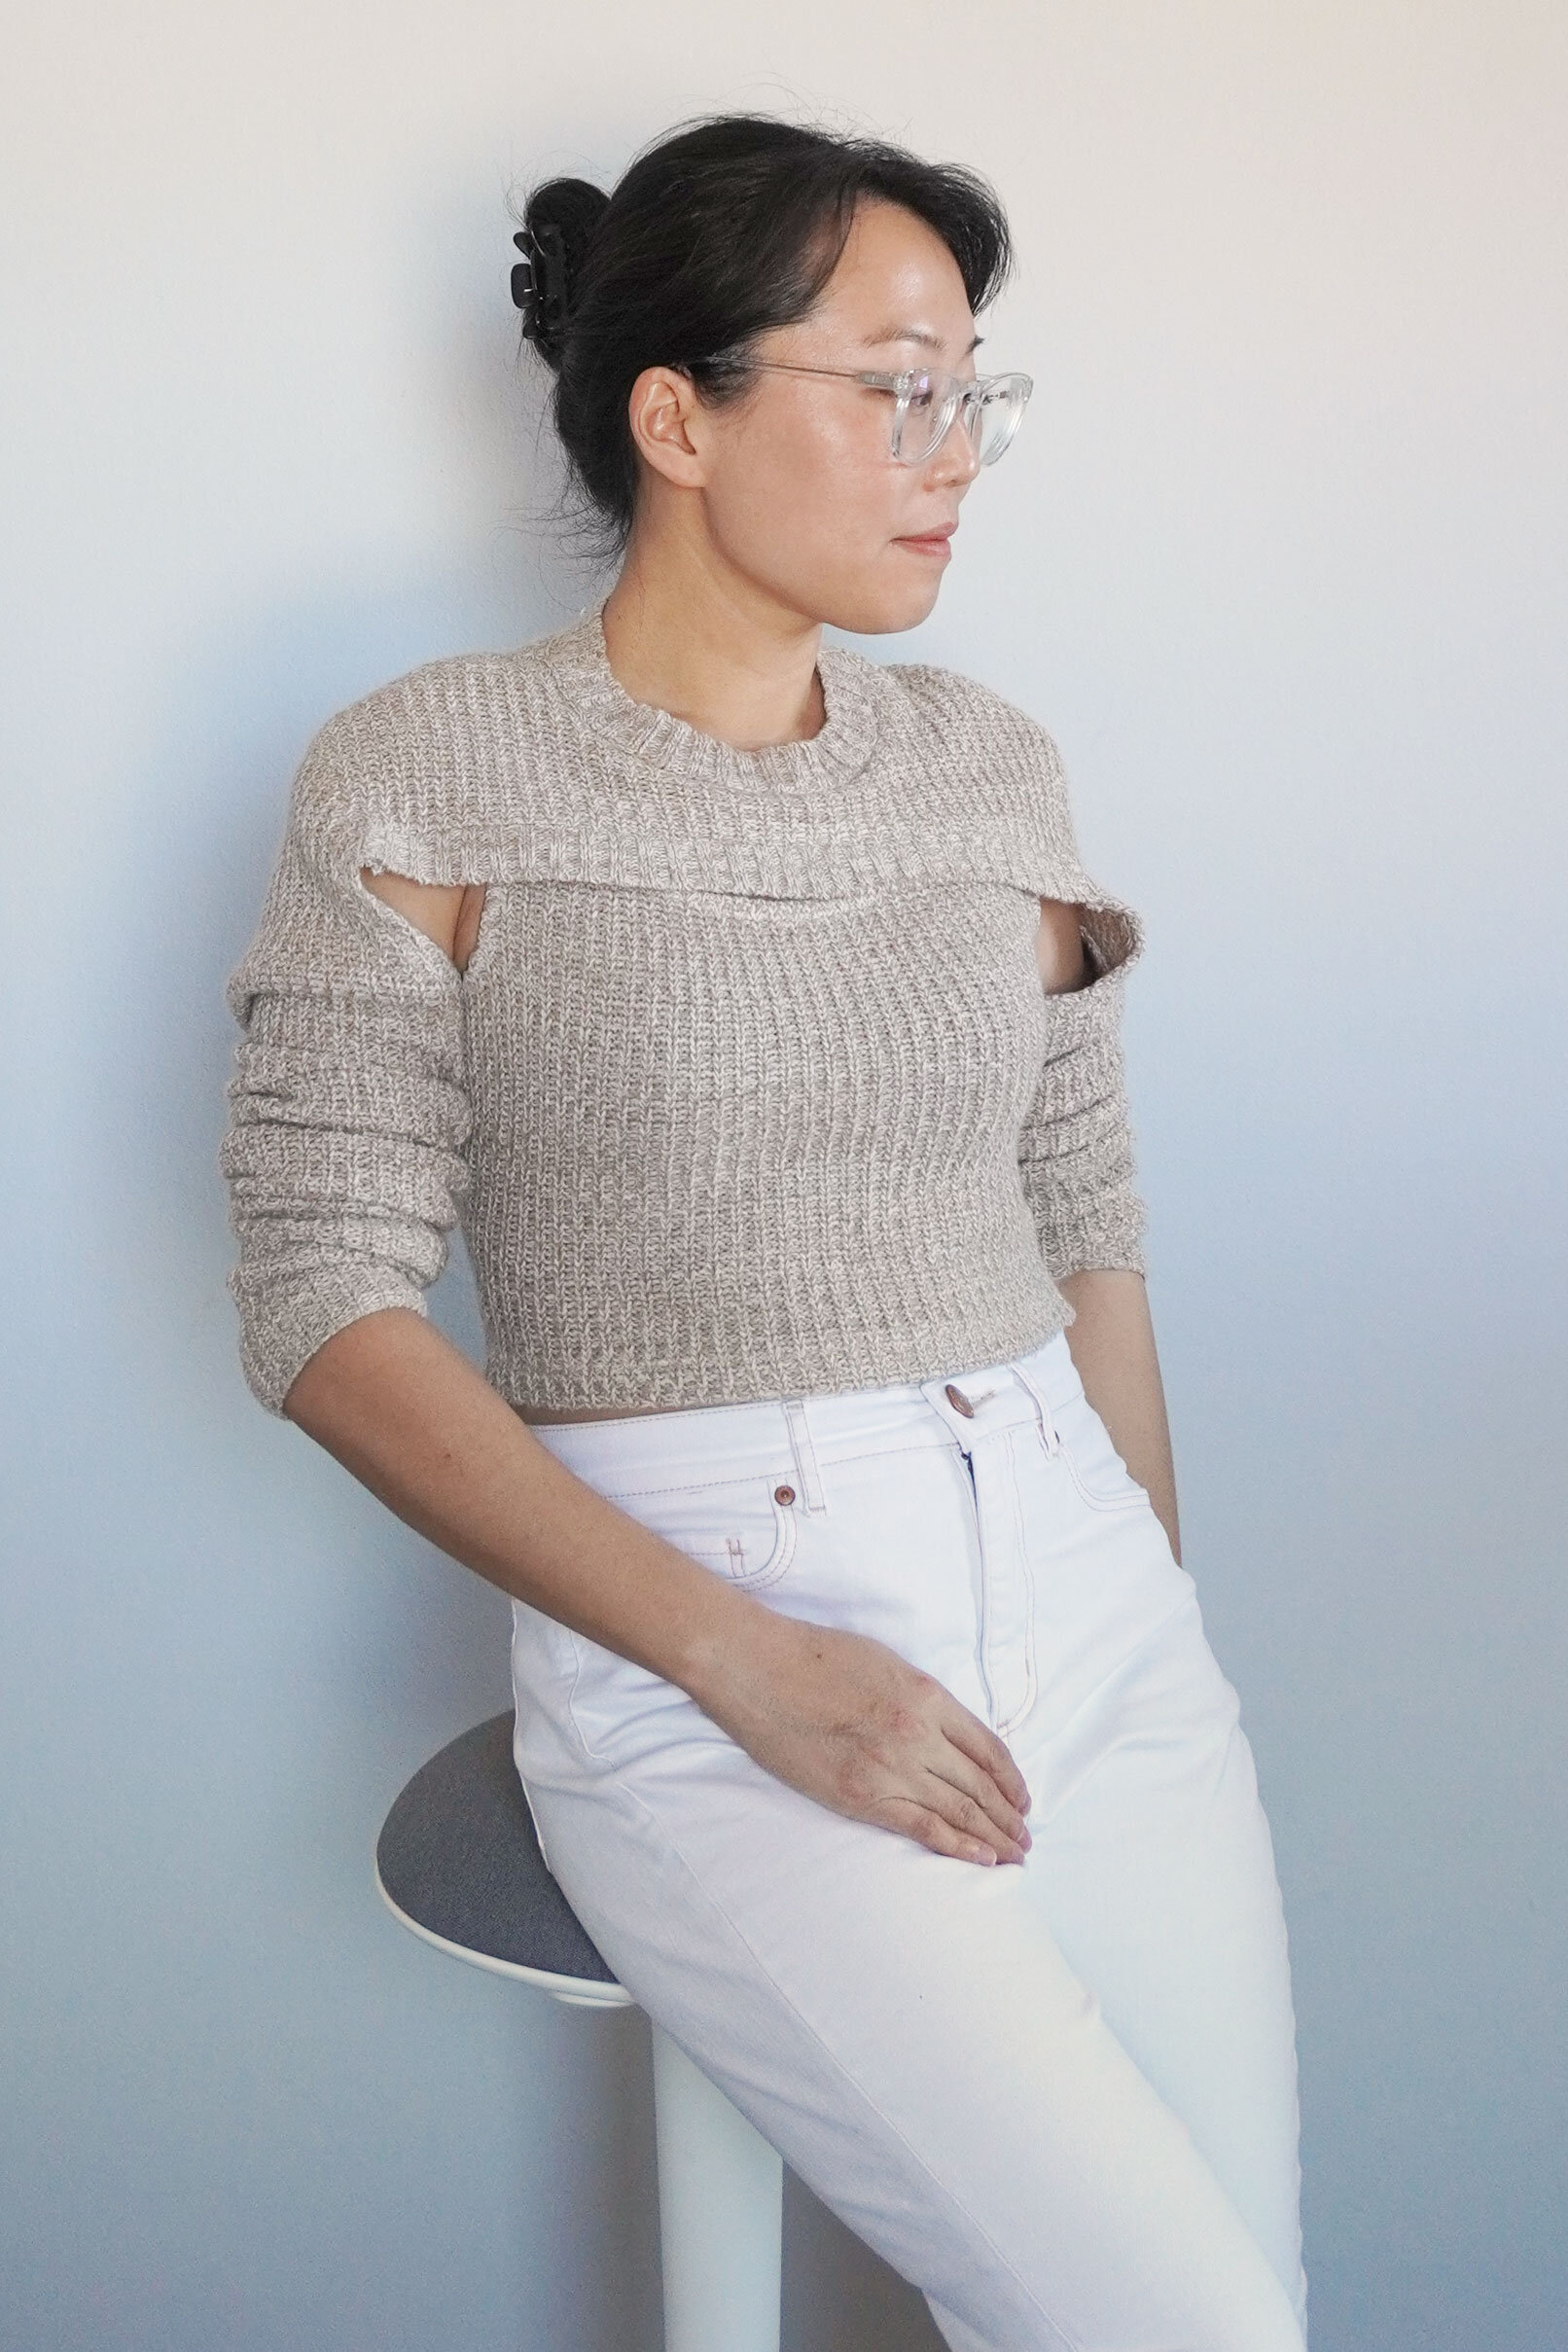
This was a pretty straightforward sew, complicated only by the fact that I had to sew on new sleeve caps to the sleeves that I took from my original sweater dress. I used the ribbing that I had salvaged from my original sweater dress and used that for the neckline and the hem in the front. The top part of the sleeve is attached to the bodice, but the bottom of the armhole is not, so I finished the edge of that part of the armhole using clear elastic. I also finished the hem in the back with more clear elastic, to prevent the hem from stretching out. I might go back and add clear elastic to the front hem as well, if I see that the hem is stretching out after some wear.

For whatever reason, after trying the cropped cardigan/shrug on, I found that I needed to pinch out quite a lot of excess at the shoulder seam to get everything to lie flat. I also found that the armhole and sleeves were too wide and I ended up re-sewing the sleeves in with a wider seam allowance to bring the armhole in a bit on my shoulder. I’m not sure why I needed to do this, as I don’t think it’s an issue with the pattern - it might just be a quirk of my loose knit fabric, so take this with a grain of salt. I point it out only to note that after you have constructed the cropped cardigan and tried it on, you might find that you need to make some adjustments to make the cropped cardigan more fitted.

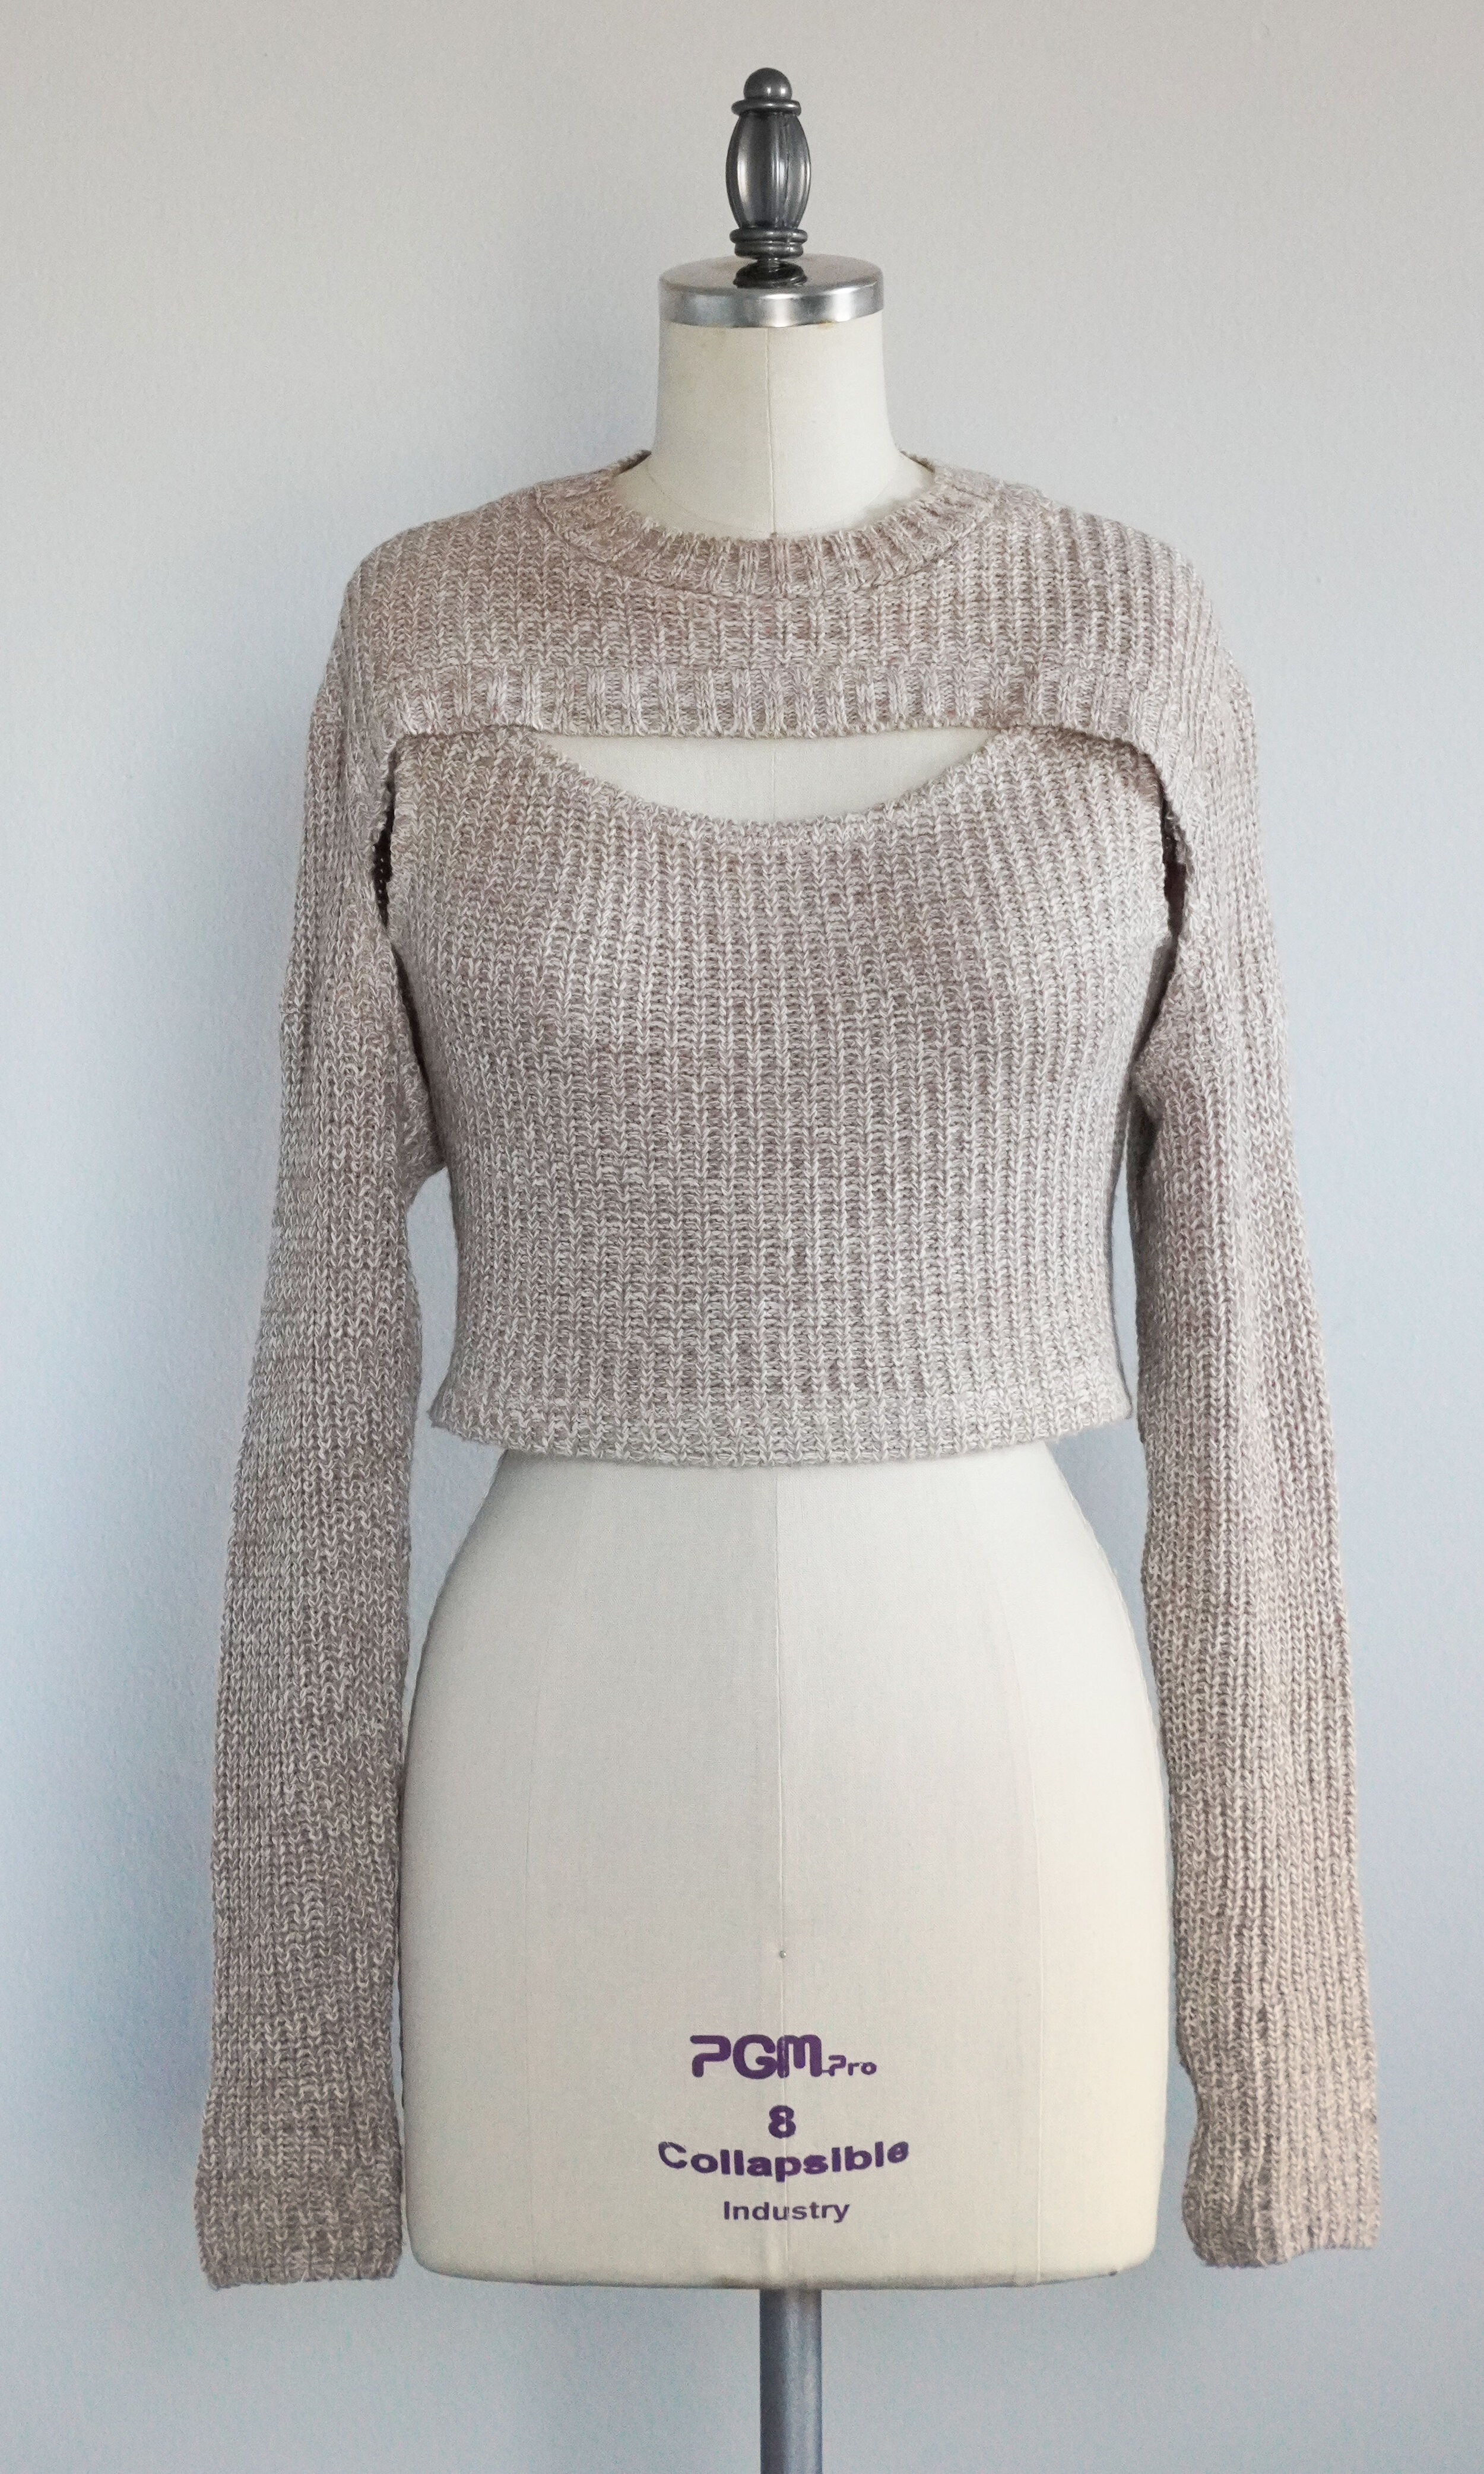
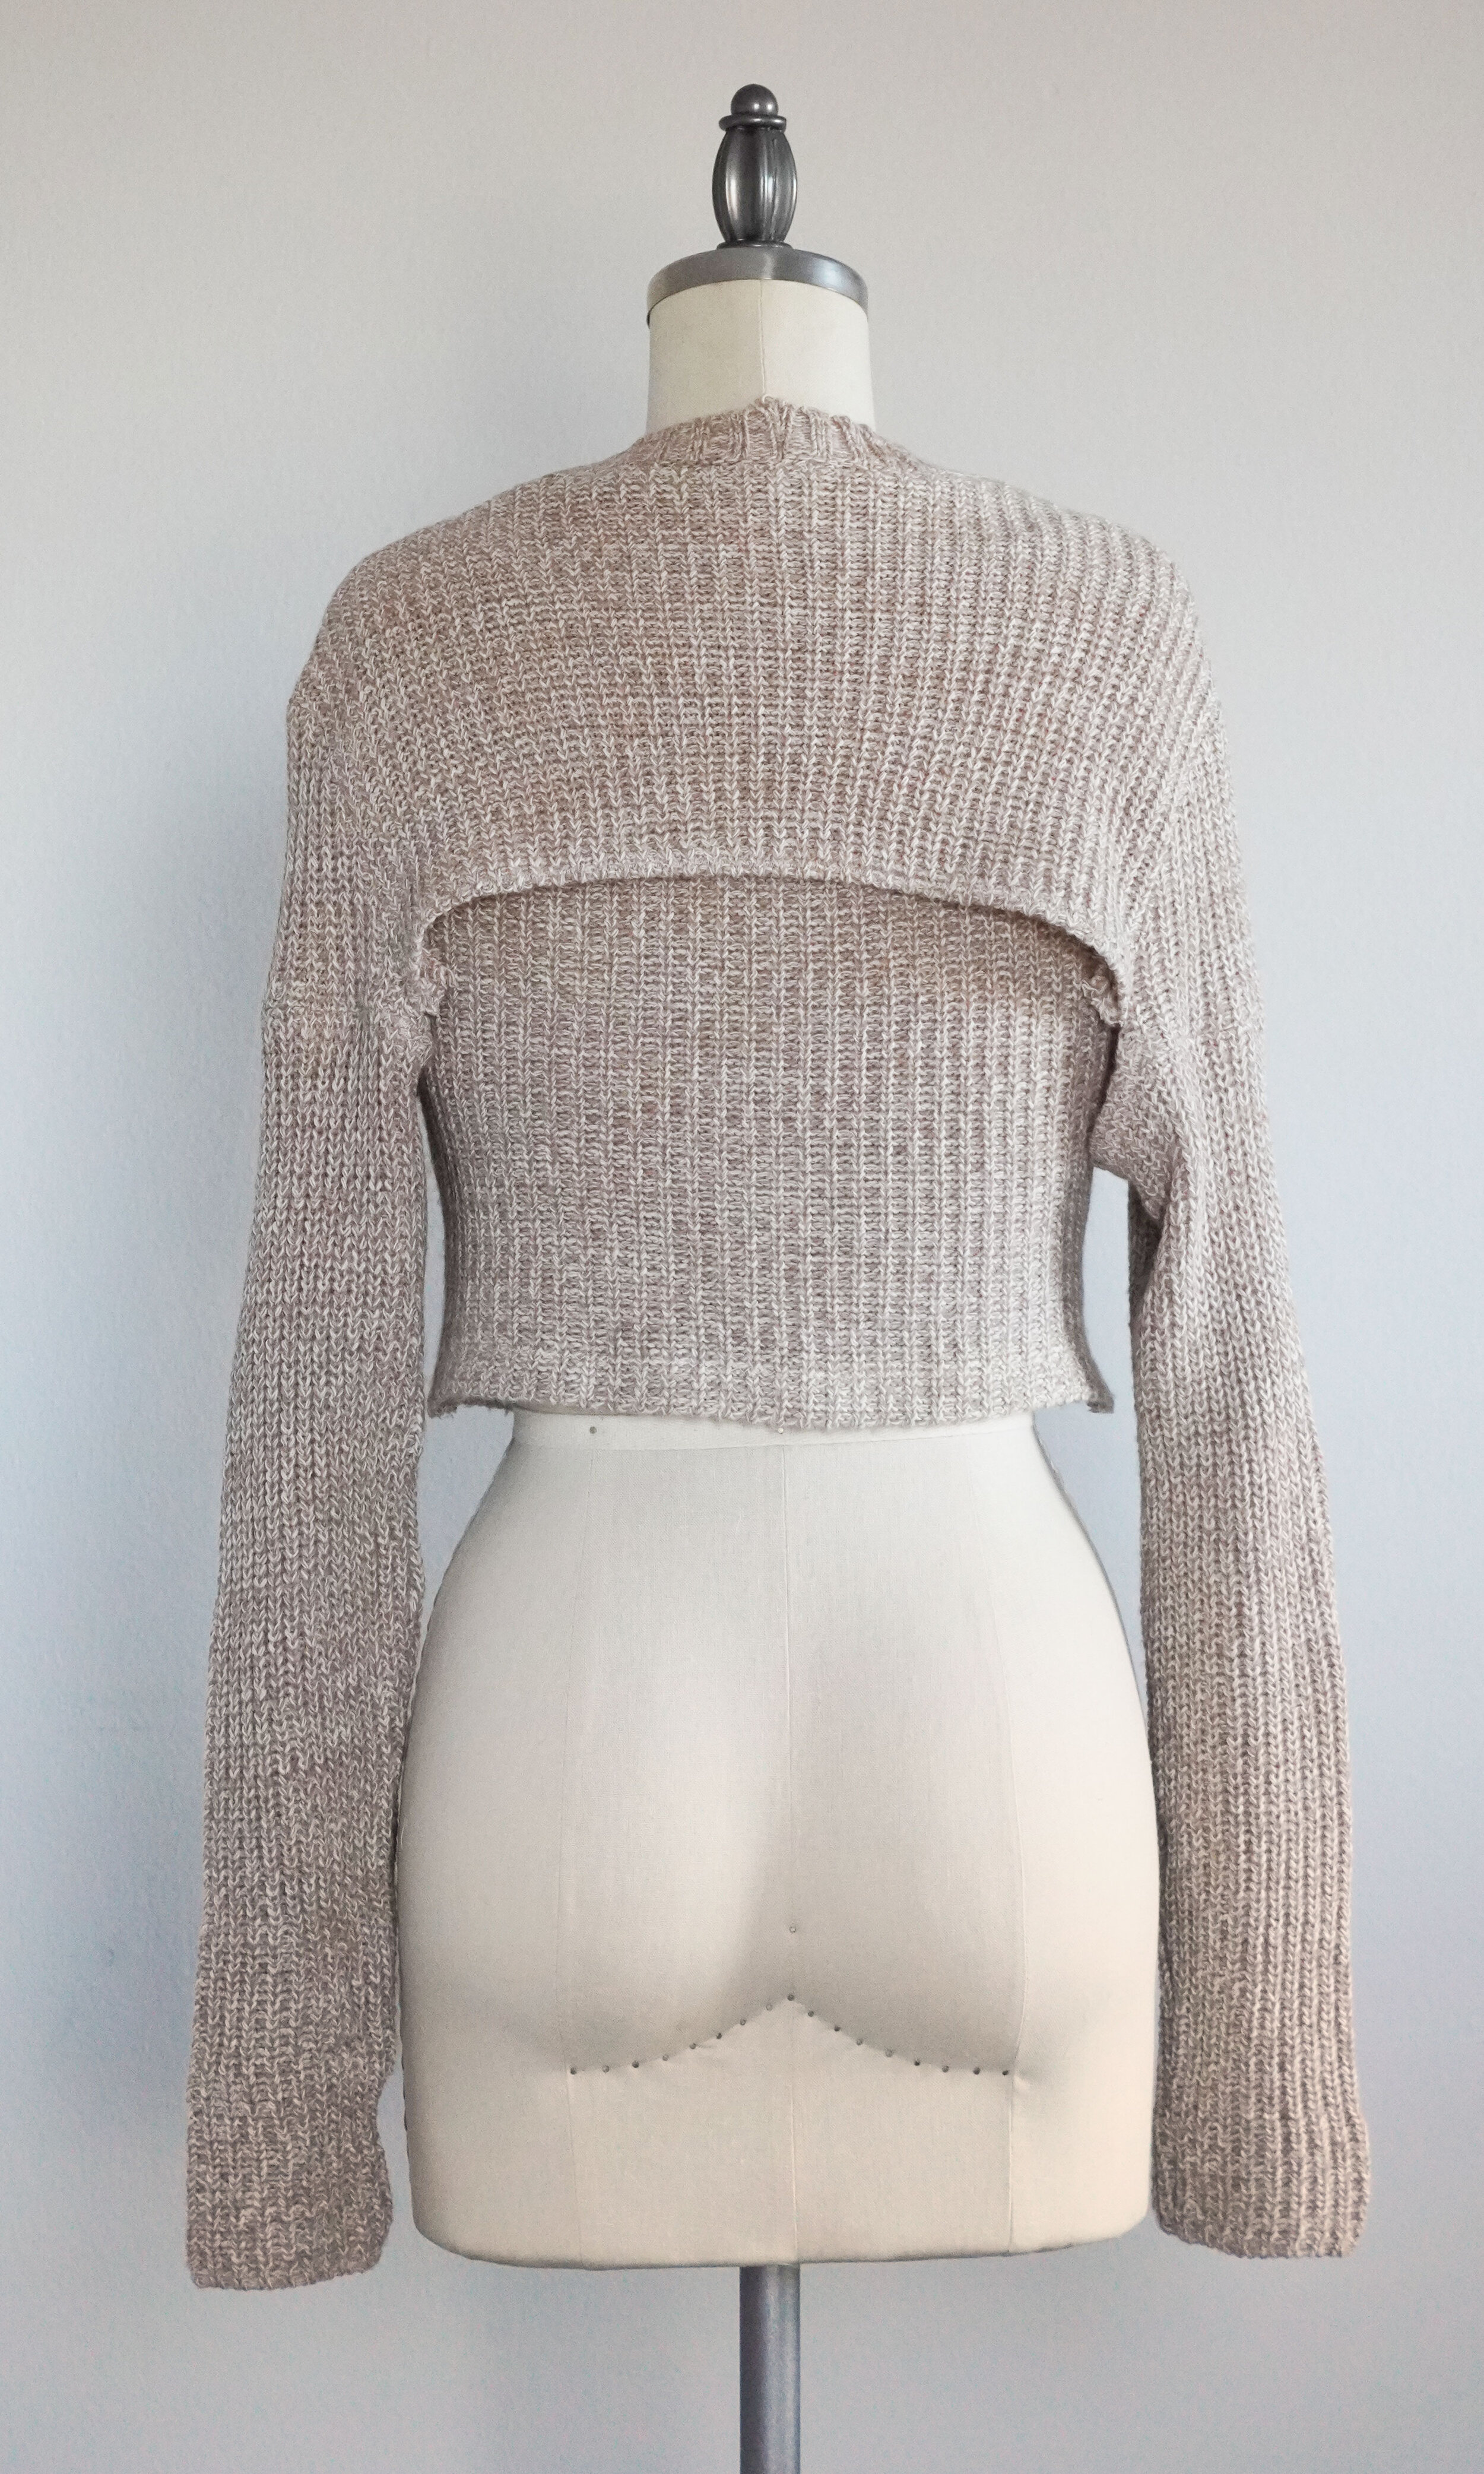
Overall, I’m thrilled that I was able to give my old sweater dress a new lease on life and transform it into this trendy cropped cardigan. The sweater set is really comfortable and much warmer than I would have thought, considering it’s a tank top and cropped shrug. I’ve been wearing it lots of different ways - on shoulder, off shoulder, with just the shrug paired with other tank tops. I could imagine pairing it with a loose wide-legged pant in a soft cozy fabric (that’s my next project - to make these wide-legged pants out of some old linen sheets I have laying around). Best of all, it’s a bargain AND it’s good for the environment: instead of throwing away the sweater dress and spending $750 on a new Rosie Assoulin sweater set, I re-used my (free) old sweater dress and only spent $7 on the pattern and maybe a dollar on clear elastic. Double win!

McCall's 8003
McCall's 8003 cropped cardigan off shoulder

Here are some dress form pics:

I encourage you to refashion your old sweaters into a cropped cardigan set as well - it is really a pretty simple sew that doesn’t require any specialized equipment (no, you don’t need a serger - check out this guide to sewing knit fabrics with a regular sewing machine). Knits have a reputation of being rather tricky to sew, but I think that is hugely overblown, as chunky knits can actually hide a multitude of sewing mistakes and steam can really work magic on wavy seams. Here are a few tips to keep in mind if you do decide to make this yourself:

  • If you can’t squeeze all of the pattern pieces out of one sweater, just use two sweaters in complementary colors and make the tank top out of one sweater and the cropped cardigan/shrug/bolero out of the other.

  • If you don’t already own a good sweater to refashion and you’re shopping for one at a thrift store, look for the biggest size you can find, to give yourself more fabric to work with. Also look for a sweater dress with a chunky knit (either ribbing or cables) - the cropped cardigan really needs that chunky texture to get that slouchy, cozy effect.

  • When cutting the fabric, try to use as many features of the existing sweater as possible - salvage the ribbing, keep the cables and use the bottom hem and sleeves.

  • Don’t forget to cut out an extra back bodice piece for the cropped cardigan.

  • Don’t forget to trim the neckline and armholes of the tank top. This will make the tank top much more comfortable to wear.

  • You might need to take in the cropped cardigan to make it more fitted to your body. (I ended up pinching out quite a lot of excess at the shoulder seam and bringing the sleeve in a bit.)

Are you inspired to make your own cropped cardigan set? Let me know in the comments!

15 Questions Beginner Sewers Frequently Ask

Disclosure: This post may contain affiliate links and I may earn a small commission when you click on the links at no additional cost to you. I only recommend products I would use myself and all opinions expressed here are my own.

Over the years, I have answered a lot of the same questions over and over from beginners who are just starting their sewing journeys, so I thought I would write a post summarizing my answers to 15 of those frequently-asked questions. Note that my answers are not tips on how to sew perfect garments - the idea here is to balance what you really need to do with what you realistically have the time and energy to do (especially as a beginner).

Please let me know in the comments if you have other questions that you’d like answered - I plan to keep updating this post periodically with new Q&As.

Vintage sewing machine

Equipment

One thing I love about sewing is how easy it is to get started - unlike some of my other hobbies, it doesn’t demand that you buy a ton of expensive gear just to take your first few steps. Below are my thoughts on the bare minimum you need to get started.

Q. Do I need a fancy/expensive sewing machine?

A. No. For beginners, all you need is a sewing machine that has a straight stitch and a zig zag stitch. Everything else is totally unnecessary - you don’t need a million different decorative stitches, you don’t need a computerized machine, you don’t need an automatic needle threader, and you don’t need a dozen different presser feet.

I bought my first sewing machine (a Janome 11543) for about $60, and it was a refurbished machine from overstock.com. It didn’t have any special bells and whistles but it served me very well when I was first starting out. About three years into my sewing obsession, I bought a new machine because I had moved to London and needed a machine with UK voltage. Since I was already buying a new machine, I thought that I would upgrade slightly and look for a machine that made nice buttonholes and had a longer stitch length that I could use for basting. None of that was necessary though - I could have easily continued on with my old machine had I stayed in the US.

Q. What tools do I need to get started?

A. You only need a few tools when you first start:

  1. Dressmaker’s shears. You don’t want to cut fabric with ordinary paper scissors, and you don’t want to cut paper with fabric scissors. Invest in a nice pair and take care of them; they will love you back. I have a pair of Gingher shears that I get sharpened every year, and I consider it one of my most treasured possessions.

  2. Measuring tape. Nothing special here - just use whatever you have lying around.

  3. Pins. I like to use these glass head dressmaker’s pins because they are thin enough to use with delicate fabrics. But honestly, any pins will work - just use whatever you can get when you first start.

  4. Tracing paper and tracing wheel. Use these to transfer markings on the sewing pattern to your fabric.

  5. Seam ripper. Because you will mess up, and when you do, you’ll need this to undo your stitching. This usually comes with your sewing machine, so there’s no need to buy this separately.

If you’re a little further into your sewing journey and you want to invest in a few more tools, here is a list of the tools that I use the most every day:

  1. Rotary cutter and cutting mat. It’s much faster and easier to use a rotary cutter to cut slippery fabrics like silk. I recommend splurging and buying the biggest cutting mat you can afford and have space for - it makes cutting large pieces of fabric much, much easier (which you’ll need to do to make full length skirts and pants).

  2. Large clear plastic ruler. This simple tool makes so many things easier - you can use the grid lines to add seam allowances to patterns, or use the lip on the plastic ruler against the edge of your cutting mat to cut perfect horizontal lines across your fabric.

  3. Walking foot. This makes it much easier to sew delicate fabrics or leather that would shift around if you used an ordinary presser foot. Nowadays my walking foot is my default foot (that I only switch out if I need to use a specialty foot, like my buttonhole foot).

  4. Magnetic pincushion. The old-fashioned stuffed pincushions are cute but impractical - who has time to spend poking pins into the pincushion one by one? Instead, this magnetic pincushion makes it easy to pick up and store pins - you can wave this magnetic pincushion over a pile of pins or simply throw a pin in the general direction of the magnetic pincushion and it will magically stick to the pincushion.

That’s it - you really don’t need a lot of gear to sew. Over the years, I’ve tried lots of little sewing tools but haven’t ended up using most of them on a regular basis.

Q. Do I need a serger?

A. No. It’s nice to have one because it can quickly sew seams and finish the edge at the same time, but you definitely don’t need one to sew knits - instead, you can use the zig zag stitch or the triple stretch stitch on your regular sewing machine. (And if you do want to buy one, it’s not that expensive - I love my Brother 1034D, which costs less than $250.)

fabric-657037_1920.jpg

Fabric

It’s an old adage but it’s true - fabric choice will make or break your project. When I first started sewing and began going to fabric stores, I was completely overwhelmed by the incredible number of fabric types out there, to the point of paralysis. Below are some thoughts on places to buy fabrics and what types of fabrics to buy when you’re first starting out.

Q. Where can I buy fabric, buttons, zippers and other trimmings?

A. When you are first starting out, I strongly recommend buying fabric and trimmings in person, so you can feel different fabrics and start learning about them.

Fabric stores in New York

I recommend going to the Garment District near Times Square, where there are dozens of fabric and trim stores all clustered together. Below are some of my favorites:

  1. B&J Fabrics (7th Ave between 38th and 39th St). Well-organized and well-lit fabric store with really helpful sales staff. Definitely on the higher end but you get what you pay for.

  2. Mood Fabrics (37th St between 7th and 8th Ave). You probably already know about this store from their partnership with Project Runway. It’s not at the top of my list because it can be a bit messy at times and overrun by tourists, but there is no denying that you can find just about every kind of fabric you can possibly imagine, at a variety of price points.

  3. Pacific Trimming (38th St between 7th and 8th Ave). Huge store that carries pretty much every kind of trim, button, elastic, hardware, etc. you can imagine.

  4. Botani Trimming (36th St between 7th and 8th Ave). Same as above - another store that carries a wide variety of trims.

Fabric stores in London

If you’re in London and you’re a beginner, I recommend going to Goldhawk Road, where there are about a dozen stores selling affordable fabrics. I would not recommend going to the fabric stores in Brick Lane, where you’ll get incredibly cheap fabrics that are mostly polyester and difficult to work with.

If you are a bit more experienced and willing to spend a little more cash, head down to Soho in Central London, which has some lovely shops selling high-end fabrics. I like them all, but I probably went to MacCulloch and Wallis the most, just because they were closest to my flat in London and they offered the widest range of fabrics and trims/notions. One place I don’t recommend going is Liberty’s (the department store). You can buy Liberty fabrics at other stores for lower prices, including here.

The shops in Soho are already pricey, but if you are planning a high-end evening or wedding gown of a lifetime, then head to Joel & Son Fabrics near Marble Arch for truly gorgeous (but eye-poppingly expensive) fabrics. I used to live near this store in London so I would stop in to pet the fabrics (but never buy anything).

Online fabric stores

Most of the fabric stores I’ve listed above have online shops, although the selection is much smaller than the in-store selection. In terms of purely online fabric stores, if you live in the US, I highly recommend Emma One Sock because her fabrics are always high quality and she really helpfully organizes them by color family and use, which I think helps make the fabric buying process less overwhelming for beginners. Her descriptions are also really detailed - for example, she tells you the fiber content, weight, and Pantone color (which tells you the true color of the fabric, as all computer monitors are slightly different and they display colors in slightly different ways). Finally, she offers free swatches so you can (and should!) always get a sample before you commit to buying. The swatches are shipped very quickly and they will send you coordinating fabrics (e.g. lining fabric or ribbing) upon request.

For the biggest selection of fabrics, you can always go to fabric.com, and they can be a good choice if you already know exactly what you want and you just want to see it in a million different colorways or prints. However, they aren’t great for browsing and I don’t recommend it for beginners - think of fabric.com as a giant fabric warehouse where you have to find what you’re looking for with little organization or guidance. One warning: the colors in their fabric photos is often REALLY far off from the actual fabric, so always read the reviews and order a swatch before you buy. Their swatches are kind of expensive (usually a few dollars a pop), but what can you do - with this store it’s really essential to swatch before you buy.

Q. What kind of fabric should I use in my first project?

A. It obviously depends a lot on the project, but here are a few general rules of thumb:

  1. Pick a stable woven fabric that doesn’t fray too much, such as cotton poplin, midweight wool coating or even neoprene. Don’t choose something slippery like silk charmeuse or chiffon, which is tricky to handle. Don’t choose a stretchy knit fabric, like a jersey with a high degree of stretch (a stable double knit is fine because it acts more like a stable woven fabric).

  2. Pick something with some subtle texture (e.g. tweed or wool crepe). This will help hide imperfections in your stitching, as your stitches will simply ‘disappear’ into the fabric. By contrast, don’t pick something shiny (like satin) as that will show every bump and imperfection in your stitching.

  3. Stay away from stripes and large-scale prints, which can be tricky because you need to worry about print placement and matching up stripes. To begin with, use solids or small scale prints like polka dots.

  4. In general, avoid using quilting cotton if you’re making a dress. Quilting cottons are usually fairly stiff and they don’t drape against the body in a flattering way.

tape-measure-3872778_1920.jpg

Fitting

Learning to fit garments to your body is one of the trickiest things to get right for beginner sewists (and even more advanced sewists). Below are some of my tidbits of advice on fit:

Q. What size should I cut?

A. Most pattern companies will advise you to measure your chest, waist and hips and then compare your measurements to their size chart to determine which size to cut. That’s probably fine for your first project or two, but sooner rather than later you’ll want to move beyond that because blindly following the size charts is often a recipe for a disappointment, especially if you are using a Vogue / McCall’s / Butterick pattern because they often incorporate a ton of ease into their patterns.

A much better way to decide what size to cut is to look at the finished garment dimensions that are printed on the pattern (see example below) and compare them to my measurements at any point where the garment is fairly fitted. You will want to cut the size that will accommodate your measurements plus your desired amount of ease (for me, that’s usually between 1-2 inches), anywhere the garment is supposed to be fitted to the body. For example, for a fit-and-flare style dress, I would compare the finished garment dimensions at the waist and bust area against my measurements (plus 1 or 2 inches of ease). I don’t need to compare the dimensions for the hip area because I know that the skirt in a fit-and-flare dress is pretty loose around the hips. If, on the other hand, I was making a column dress which was pretty fitted at the bust, waist and hips, then I would want to compare my measurements to the finished garment dimensions at the bust, waist and hip area.

Keep in mind that most people will be different sizes in their chest, waist and hips. That is perfectly fine - just cut each part to the right size and blend them together. For example, I have a thicker waist so I usually need to cut the waist portion of the pattern one size bigger than my chest and hips.

Q. How do I fit my garment?

A. There are an endless variety of fit issues so it is impossible to address fit issues for everyone in an FAQ. My best advice on fit is to (1) buy a reference book like Fit for Real People that includes pictures that can help you diagnose and fix common fit issues; and (2) get to know one pattern company by using several of their patterns and learning what alterations you need to make to their patterns, rather than jumping around and using patterns from many different companies. For example, I’ve sewn a ton of Vogue / McCall’s / Butterick patterns over the years, and by now I have a standard set of adjustments that I always make to their patterns (namely, I’ll cut a size 10 in the chest and hips, grading to a size 12 in the waist; cut a size 6 in the sleeve; remove 1/2 inch at the center back to account for my straight back; and add an inch to the bodice length to account for my long waist.

Q. Can I fit myself?

A. It’s difficult and time consuming, but it can be done. If it is a dress or a fitted top with a back closure, I usually pin or baste a zipper in, then try on the garment inside out, so the seam allowances face to the outside. That makes it easier to pinch out the excess fabric and put a pin in where the new seam should be. I’ll roughly pin or otherwise note where the alteration should be, take the garment off and adjust the pins, then try it on again and make further adjustments. It usually takes several iterations of this before I get the fit just right.

tailoring-2575930_1920.jpg

Construction

Especially in my first few years of sewing, I often wondered if I really needed to do every step shown in the pattern instructions, or if I could just skip some of the steps and finish my project faster (what can I say, I was and am impatient). Below, I answer this age-old question for some of the most common steps in garment construction.

Q. Do I really need to make a muslin/toile?

A. It depends, but I often think the answer is no. (By the way, a muslin or a toile is a test version of the garment, usually made out of a cheap unbleached cotton.) In my opinion, you can skip making a muslin if:

  • It’s a tried-and-true pattern that you’ve used before and you have already worked out all of the kinks.

  • It’s a pattern company that you’re very familiar with (for example, as I noted above I sew a lot of Vogue patterns and by this point, I know what adjustments I always need to make to their patterns to adapt them for my body).

  • It’s a loose-fitting garment (e.g. an oversized coat or a loose dress) or it is made of knit or stretch fabric (e.g. a sweater). In these cases, I would just look at the finished garment dimensions on the pattern, check that it seems like the right amount of ease for me, and move on.

On the other hand, I would make a muslin if:

  • It’s a pattern company that is new to you and that drafts to a body that is very different from yours. For example, when I first started sewing, I was totally enamored of Hot Patterns’ kimono wrap dress (this was back in the day when Kara Saun would rock them on Project Runway), but I knew from reading reviews on the internet that they draft for curvier women, which is not my body shape at all. That’s exactly what happened when I tried making a muslin - I ended up having to take out so much fabric in the bust area that I essentially ended up re-drafting the pattern. Lesson learned.

  • You’re not sure if the style will be flattering and/or you suspect that you might need to make some changes to make the style suit your body type. Last year, I fell in love with a pattern for an off-the-shoulder jacket, but I feared that the off-the-shoulder detail would make me look like a linebacker. I made a muslin and, sure enough, it turned out to be hideously unflattering on me.

  • There are some construction details that you aren’t familiar with and you want to try out beforehand so you don’t mess up the real thing. I did this with the Rachel Comey jumpsuit last year - reading the pattern instructions, I could tell that the construction of the pocket was a bit unusual, so I wanted to make a muslin first so I could get used to the unusual construction technique.

  • You’re planning to make the garment in a really expensive fabric. Obviously, you don’t want to waste your expensive fabric, so it’s worth making a muslin to practice first.

Q. Do I really need to pre-wash my fabric?

A. You rarely need to pre-wash fabric, in my opinion. There is obviously no need to pre-wash fabrics that are going to be sewn into garments that you will dry clean (e.g., silk). I also think you don’t really need to pre-wash fabrics made from manmade fibers (e.g. polyester and nylon). However, if you are using a fabric that will shrink in the wash (e.g., cotton), then it is important to pre-wash. I’ve learned this through bitter experience - a few years ago, I made some wrap dresses out of this gorgeous printed cotton jersey, but they shrank and became child-sized clothes after the first wash.

Q. Do I really need to notch my seams?

A. Yes, if your seam is curved, like around the bust area. (If you don’t know, notching refers to literally cutting notches into your seam allowance.) If you skip this step, your curved seam will not press flat and you won’t get that polished finish (usually in the bust area it results in an unflattering pucker in the nipple area).

Q. Do I really need to grade my seams?

A. Yes, if your fabric is bulky. (If you don’t know, grading seams refers to trimming seam allowances down to different widths. Why different widths? Because if both seam allowances are the same width, that creates a lot of thickness in the same place, which will result in a visible ridge on the outside of the garment. You can avoid that by trimming the seam allowances down to different widths.)

It is also essential to trim your seam allowances if you have a corner seam. If you don’t trim your seam allowances, you won’t get that nice crisp point at your corner. You’ll need to do this even if your fabric isn’t that bulky.

Q. Do I really need to finish my edges?

A. Yes, if you are working with a woven fabric. You don’t if you’re working with knit fabrics or other fabrics that don’t fray (e.g. faux leather or neoprene). It doesn’t have to be a fancy finish - if you’re a beginner, you can just pink the edge using pinking shears or stitch a zigzag stitch and then trim down your seam allowance close to the zigzag.

Q. Do I really need to interface?

A. Yes. Interfacing (i.e., extra fabric added to the inside of your garment to make a part of your garment more rigid) will instantly make your garment look crisper and more professional. It’s the difference between crisp vs. limp collars, lapels and cuffs, and it’s especially important when making coats and jackets. It doesn’t take much time to properly interface your garments if you use fusible interfacing (i.e., interfacing that has glue on one side so it sticks to your fabric when you iron it).

Quick aside: I have experimented with sew-in interfacing over the years (especially when tailoring) and I just don’t think it’s necessary in most cases. I understand that if you want to make a coat that will last for 10 years, you’ll want to use sew-in interfacing and hand pad-stitch the lapel. But these days, I don’t have that kind of time, and I’m probably not going to be wearing the same coat in 10 years, so I just don’t think it’s worth it. I find the fusible tailoring methods shown in Tailoring: The Classic Guide to Sewing the Perfect Jacket to be enough to make a crisp tailored jacket or coat.

Q. Do I really need to staystitch?

A. Personally, I don’t think so. (I’m sure some of you will tell me I’m wrong.) I’ve often skipped this step and I’ve never had a neckline stretch out on me.

(For those who don’t already know, staystitching is when you stitch a straight line to prevent distortion of the fabric, usually around curved edges like necklines. It is usually done when the piece is still flat, before the pieces are sewn together.)

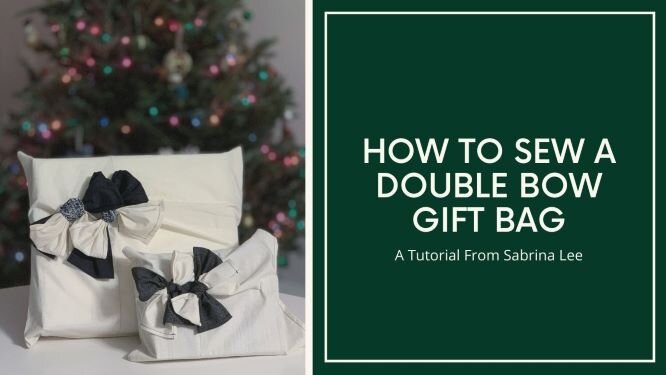
Free Pattern: Fabric Gift Bag With A Double Bow

The Christmas season is rapidly approaching, so I thought I would share my pattern for a unique fabric gift bag with a double bow. This is a gorgeous way both to reduce waste from gift wrap and use up leftover fabric from past projects.

Gift-bag-square-cropped.jpg
Main pic (2).jpg

To make this pattern, I adapted the technique shown in Pattern Magic, a series of Japanese pattern drafting books that show you how to add amazing sculptural details into your garments. The book shows you how to add this bow detail to a bodice, but I’m too old to be wearing giant bows on my shirts, so I decided to add it to a bag instead. To get the pattern, scroll down to the bottom of this post and click on the link. But before you do that, read on for some important notes on assembly, fabric choice and construction.

Assembling the Pattern

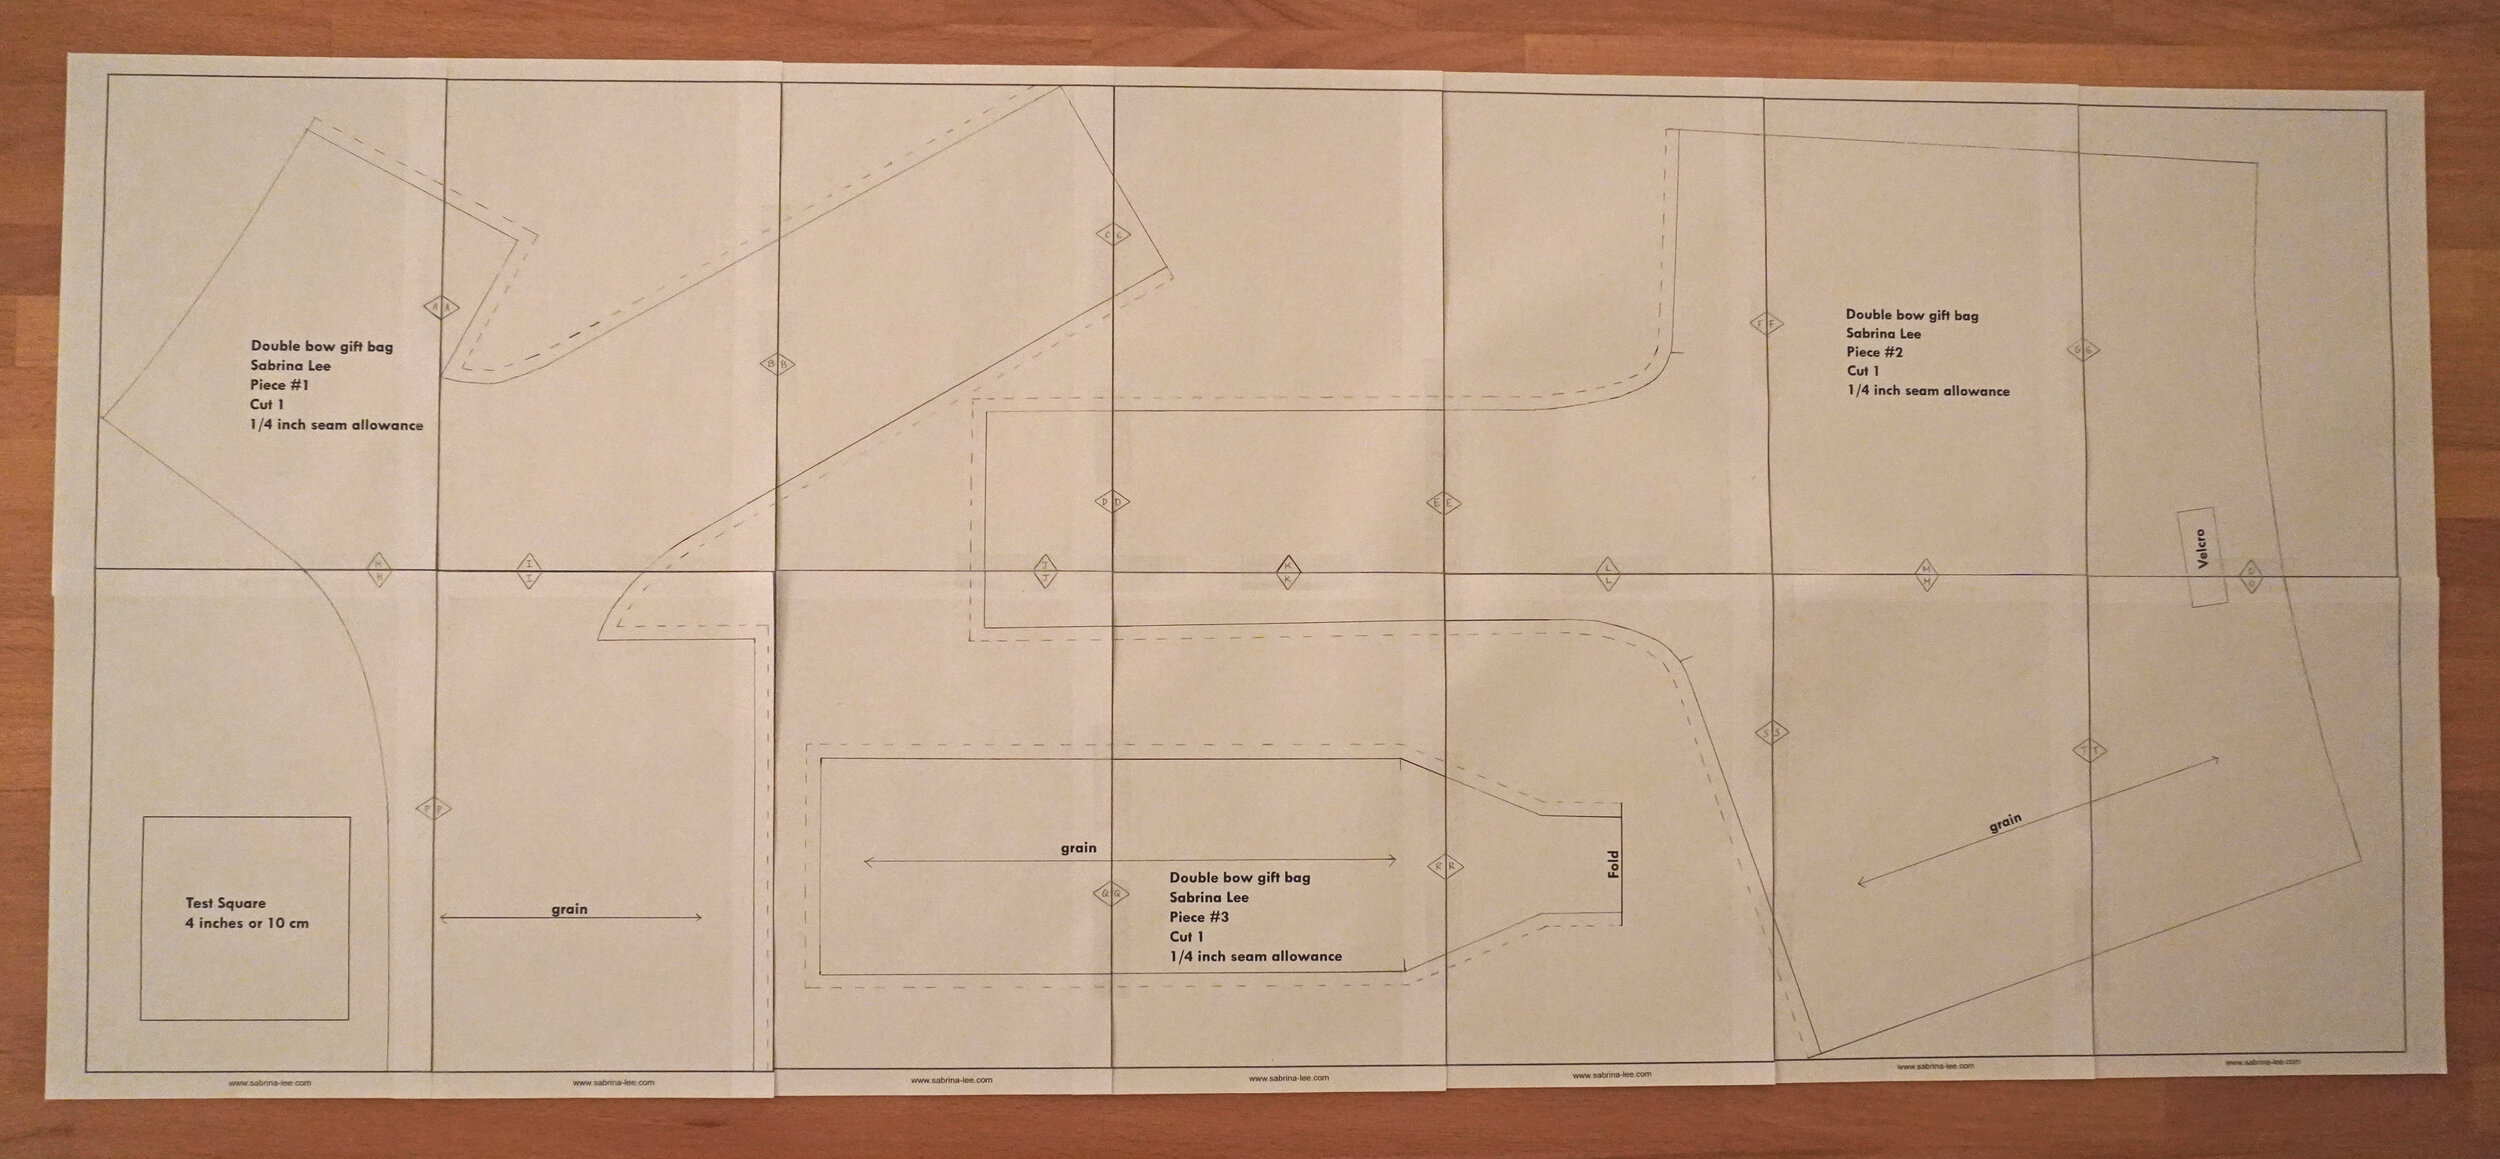
The pattern consists of 14 pages. Make sure you print out the pattern at actual size (not “scale to fit”), so make sure you check your printer settings before hitting print. On page 8, there’s a test square that should measure 4 inches by 4 inches - print that out first and measure it to make sure that everything is printing to the correct scale. If the test square looks good, assemble the pattern by laying out the pages in two rows of seven pages each, then matching up the triangles with the letters. Your pattern should now look like this:

Assembled pattern.jpg

If you’ve never worked with a PDF pattern before and you want more detailed instructions, check out Colette’s several years old but still useful blog post here.

Now that the pattern is assembled, cut out the three pattern pieces (which are the front left half of bag, front right half of bag and extra bow piece, respectively). I have added 1/4 inch seam allowance to the bow ‘arms’ and the extra bow piece - this is shown by the dotted line, so be sure to cut on that line instead of the solid line on that part of the pattern. I didn’t add seam allowance on the outside edge of the bag, and that’s why you don’t see a dotted line on that part of the pattern.

In addition to the three pieces indicated in the pattern, you’ll also need to cut an additional rectangle for the back of the bag. I cut a 14 3/4 inch by 18 5/8 inch rectangle.

The full sized pattern makes a bag that is roughly 14 inches tall by 18 inches wide (to give you some context, that’s big enough to hold a board game box). If you want to make a smaller version, just print the pattern at a smaller scale - for example, the smaller bag in the picture above was made using a version of the pattern printed at 67%, and it makes a finished bag that is about 9.5 inches tall by 12.5 inches wide (big enough to hold some books). If you make this scaled-down version, you’ll need to cut a 10 inch by 13 1/4 inch rectangle for the back of the bag.

Fabric choice

Use a light- to middle-weight woven fabric - it is difficult to tie the bows if you use a bulkier fabric (trust me, I tried making the bag with some leftover wool coating and it was a total disaster). One of my favorite things about this project is you can use fabric scraps from past projects in the extra bow piece. For example, I had some fabric swatches that were donated to me a few years ago by a fashion brand here in NYC, and I pieced them together to make the extra bow piece. It’s a great way to showcase fabrics that have gorgeous patterns or textures, but where you don’t have enough of the fabric to make a full garment.

Construction

The construction on this is fairly straightforward - in essence, you stitch the two halves of the front together, finish the edges of the bow arms, then stitch the second bow onto the hole in the front of the bag and stitch the entire front to the back of the bag. Need more detail? Check out the video tutorial below.

Ready to make your own double bow gift bag? Click on the link below to get the pattern. Happy sewing, and please send me pics if you end up making it!

Unique Style Icons: Coco

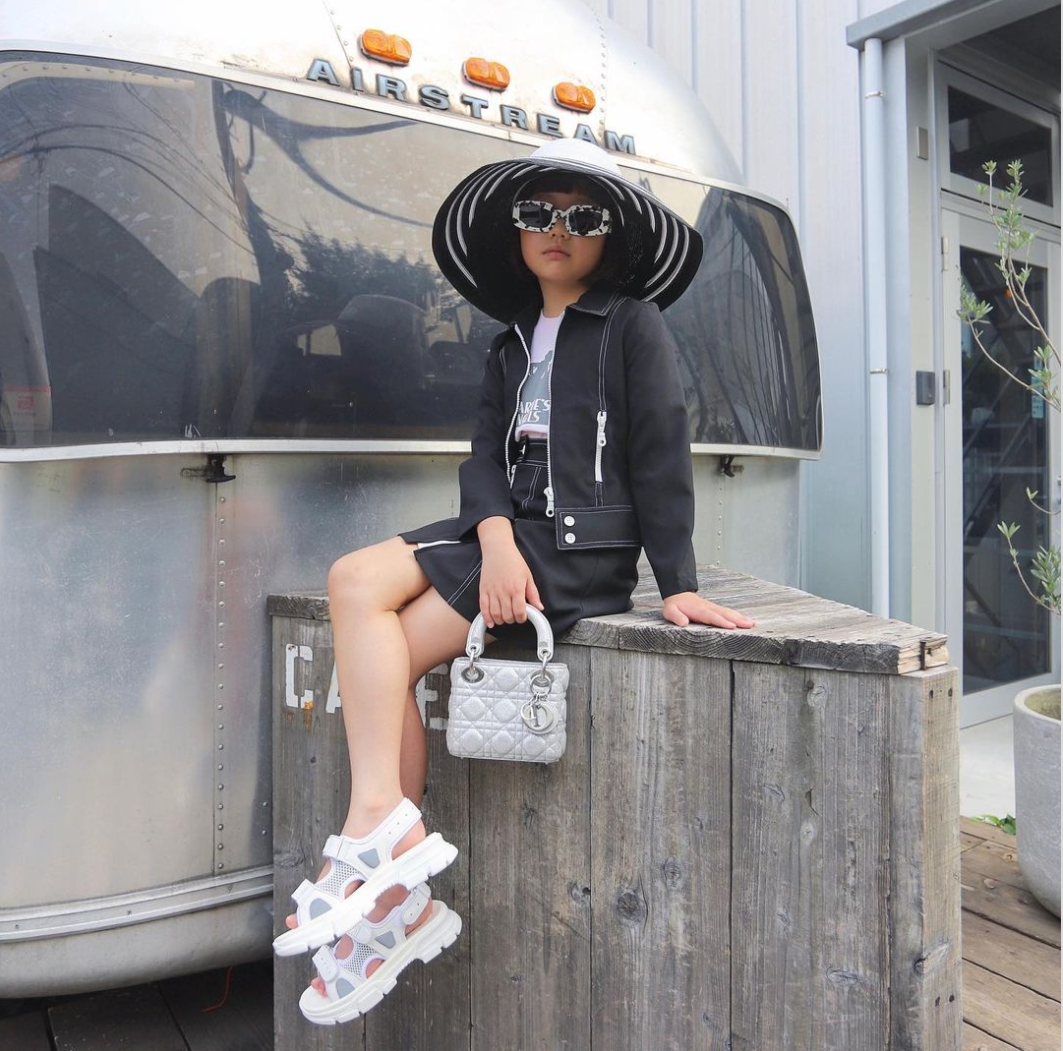
This week’s unique style icon is Coco: a young fashion influencer in Japan who hasn't even graduated from elementary school yet, but has the disaffected attitude down pat.

And here she is paying homage to Cher in Clueless:

Just look at this texture play! Best of all, it's all vintage (except the shoes, which are Fendi, naturally).

What do I admire most about Coco’s style?

  1. She has the modelling thing down pat - I’m still learning my angles and trying to lose my self-consciousness in front of the camera, while she is just naturally overflowing with attitude. And she already knows how to display the merch like a pro - see how the brand-name bag is always displayed prominently in every shot.

  2. Her total and complete commitment to the look she is creating - every detail ties into the color palette and/or textures of the look, from the shoes, to the bag, to the hat, to the sunglasses. In the first look for example, the white stripes in the hat tie in with the black speckles on the sunglasses and the white stitching and silver hardware on the jacket, while the greys in the bag and shoes also tie together. I usually pull on a dress and call it a day, but Coco really puts in the effort to make sure every detail is perfect. I can’t imagine the number of accessories she must have at her disposal to be able to so perfectly match her accessories to her looks.

  3. Her ability to rock interesting flats. As a short person, I default to wanting to wear heels to look stylish, but Coco has figured out how to make use of a wide variety of interesting flat shoe styles.

I decided to take inspiration from Coco’s last look and copy the layering, texture play and black and white color palette. I paired a cream lacy dress from H&M with a white jacket that I refashioned from a thrift store find, then added a belt, black cardigan, the chain strap from a bag, and white sneakers. I think it works a lot better than I would have thought - I feel like I could walk into any hipster coffee shop in Brooklyn in this outfit with a straight face.

Final photo.jpg

Are you inspired by Coco’s style? What elements can you incorporate into your outfits? Let me know in the comments.

How to Make a Padded Shoulder T-Shirt

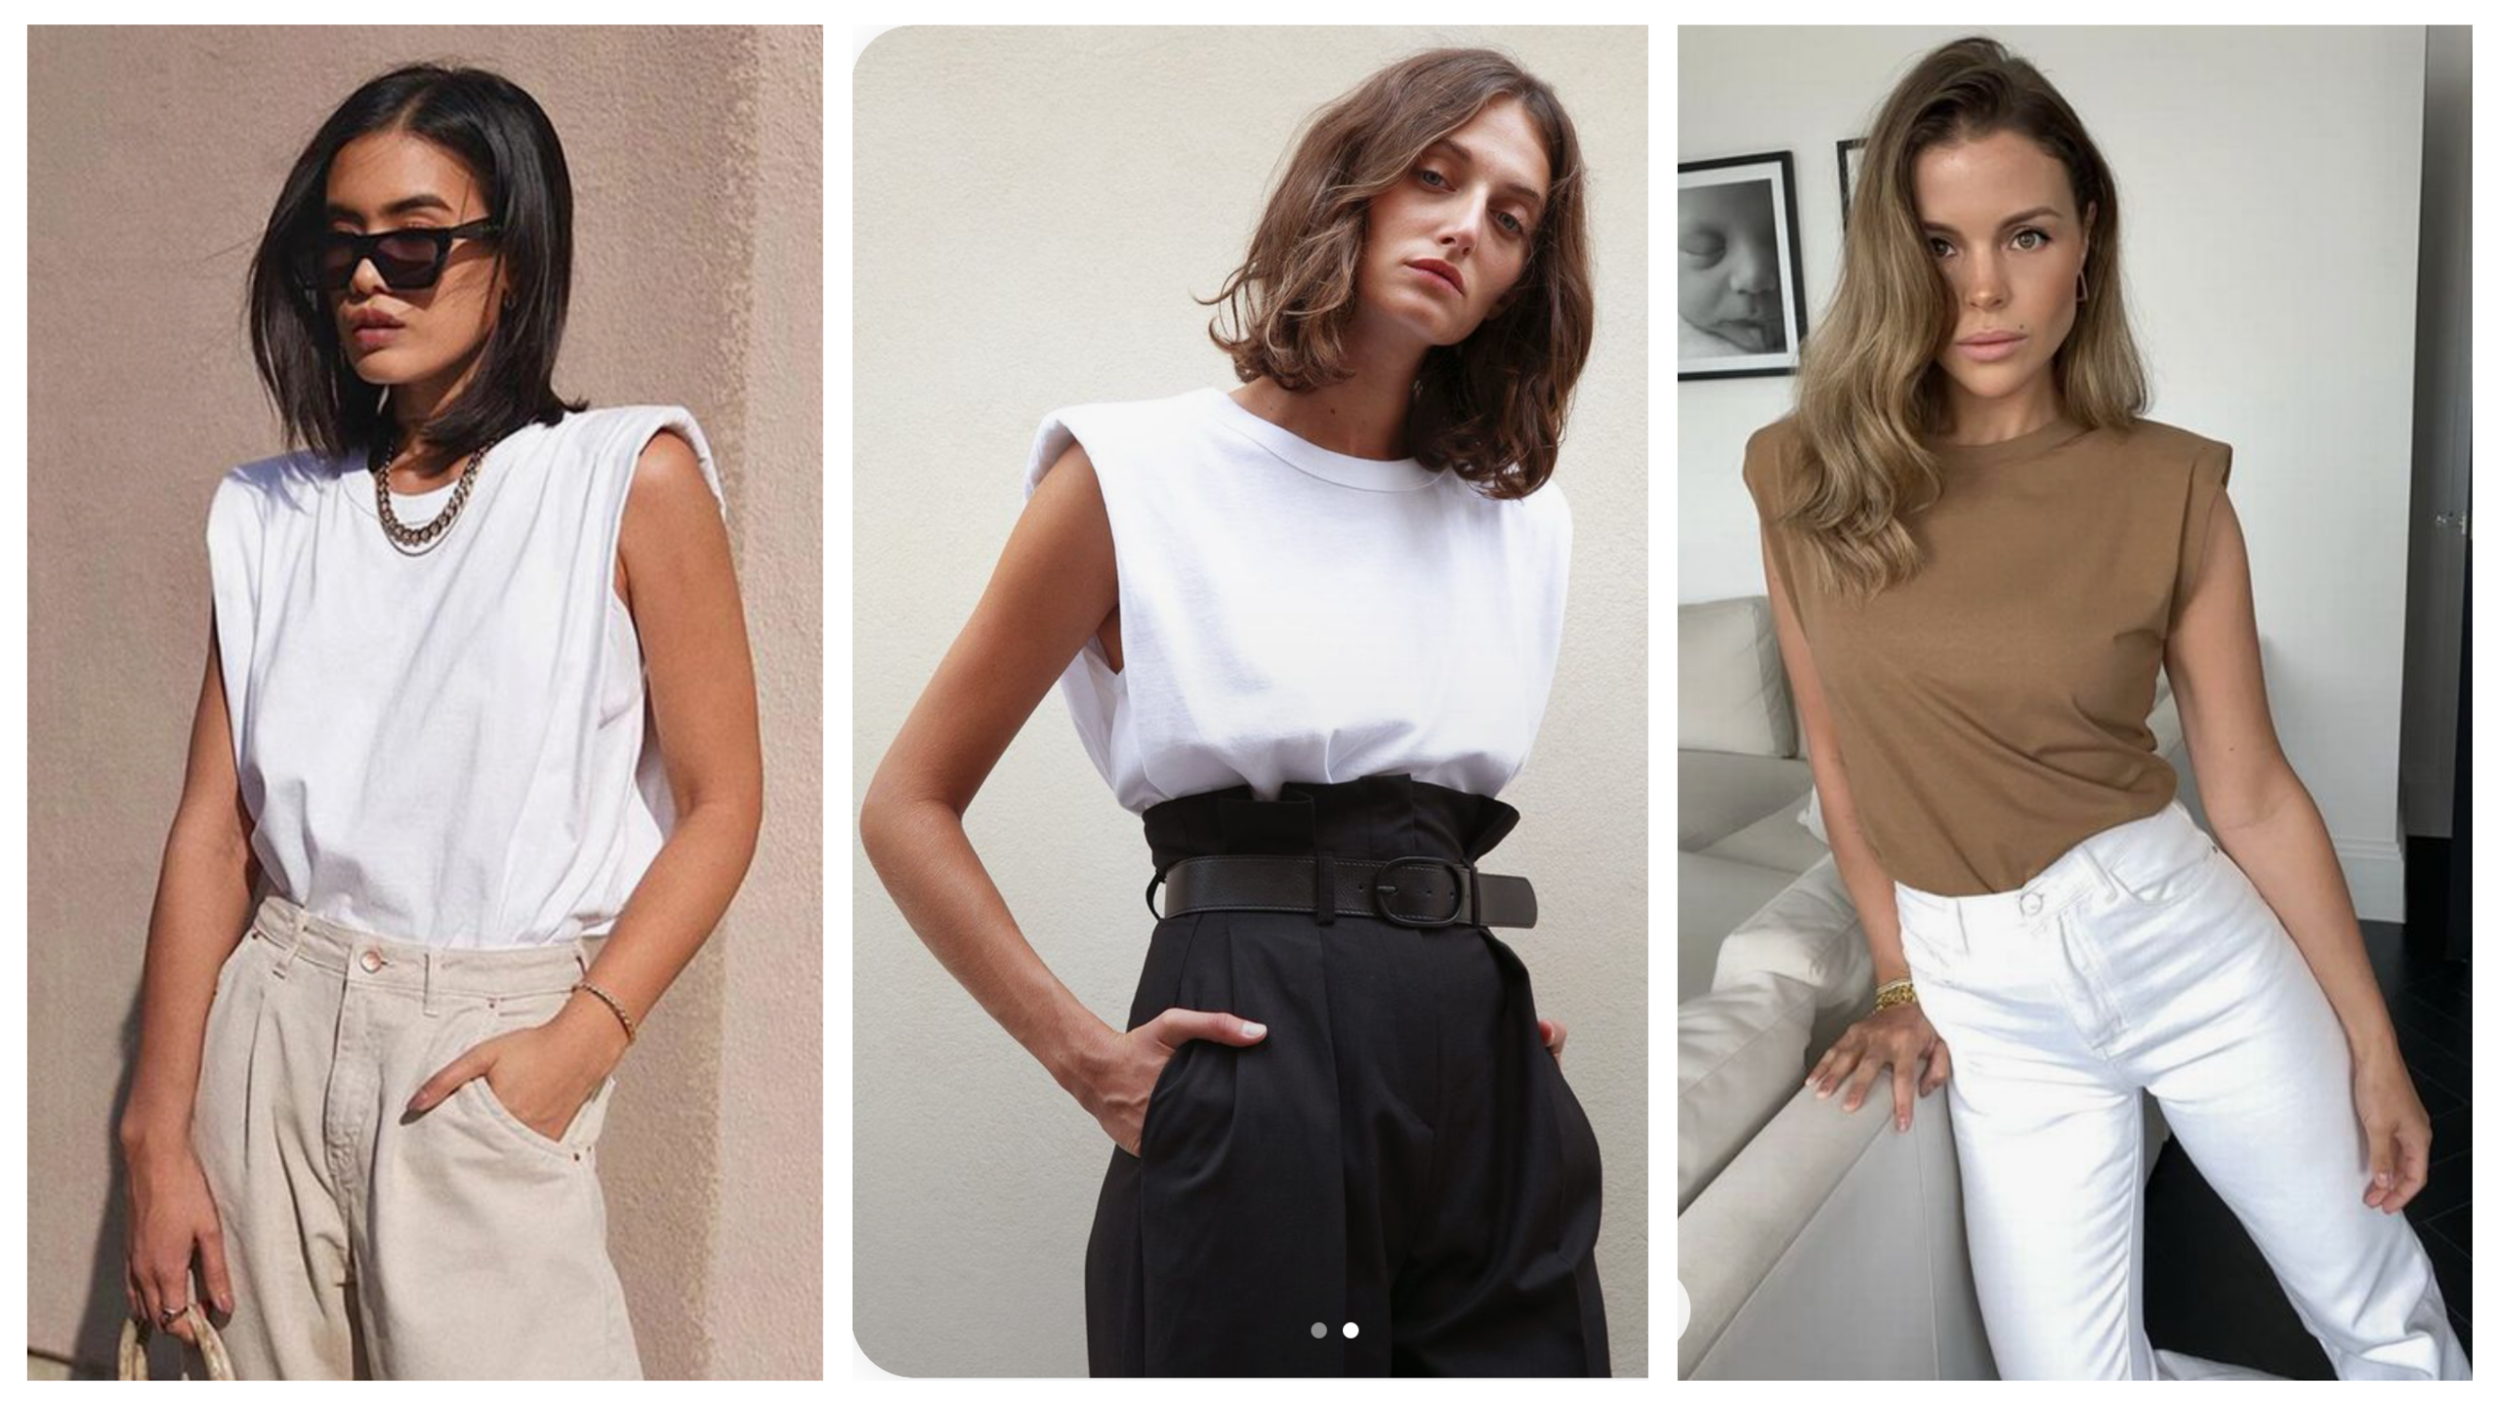
Over the summer, I saw countless iterations of the shoulder pad t-shirt all over fashion websites and social media. The simple addition of shoulder pads into the basic white t-shirt elevated the look, and it could be styled with joggers (for a casual athleisure look) or cinched pants (for a more polished look).

Photo credits: Focus VIP; The Frankie Shop; Chloe Lewis/Instagram

Photo credits: Focus VIP; The Frankie Shop; Chloe Lewis/Instagram

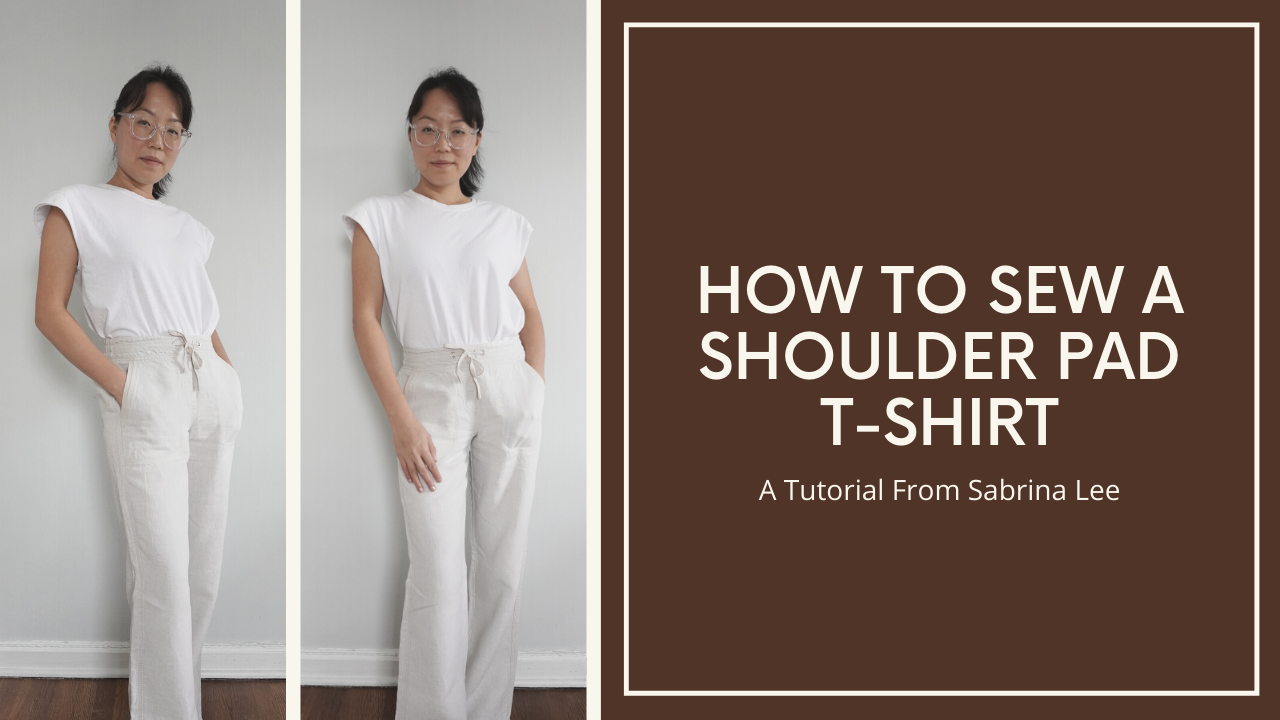
I loved this look so much I thought I would make a video tutorial showing how to add shoulder pads to a basic white t-shirt.  It’s super easy and can be done in less than 30 minutes. All you’ll need is a plain short-sleeved t-shirt and some shoulder pads, which you can get from your local craft store or on Amazon. Check out the video below!

Did you try adding shoulder pads to your t-shirt? Let me know in the comments - I’d love to see your finished projects!

Unique Style Icons: FIGTNY

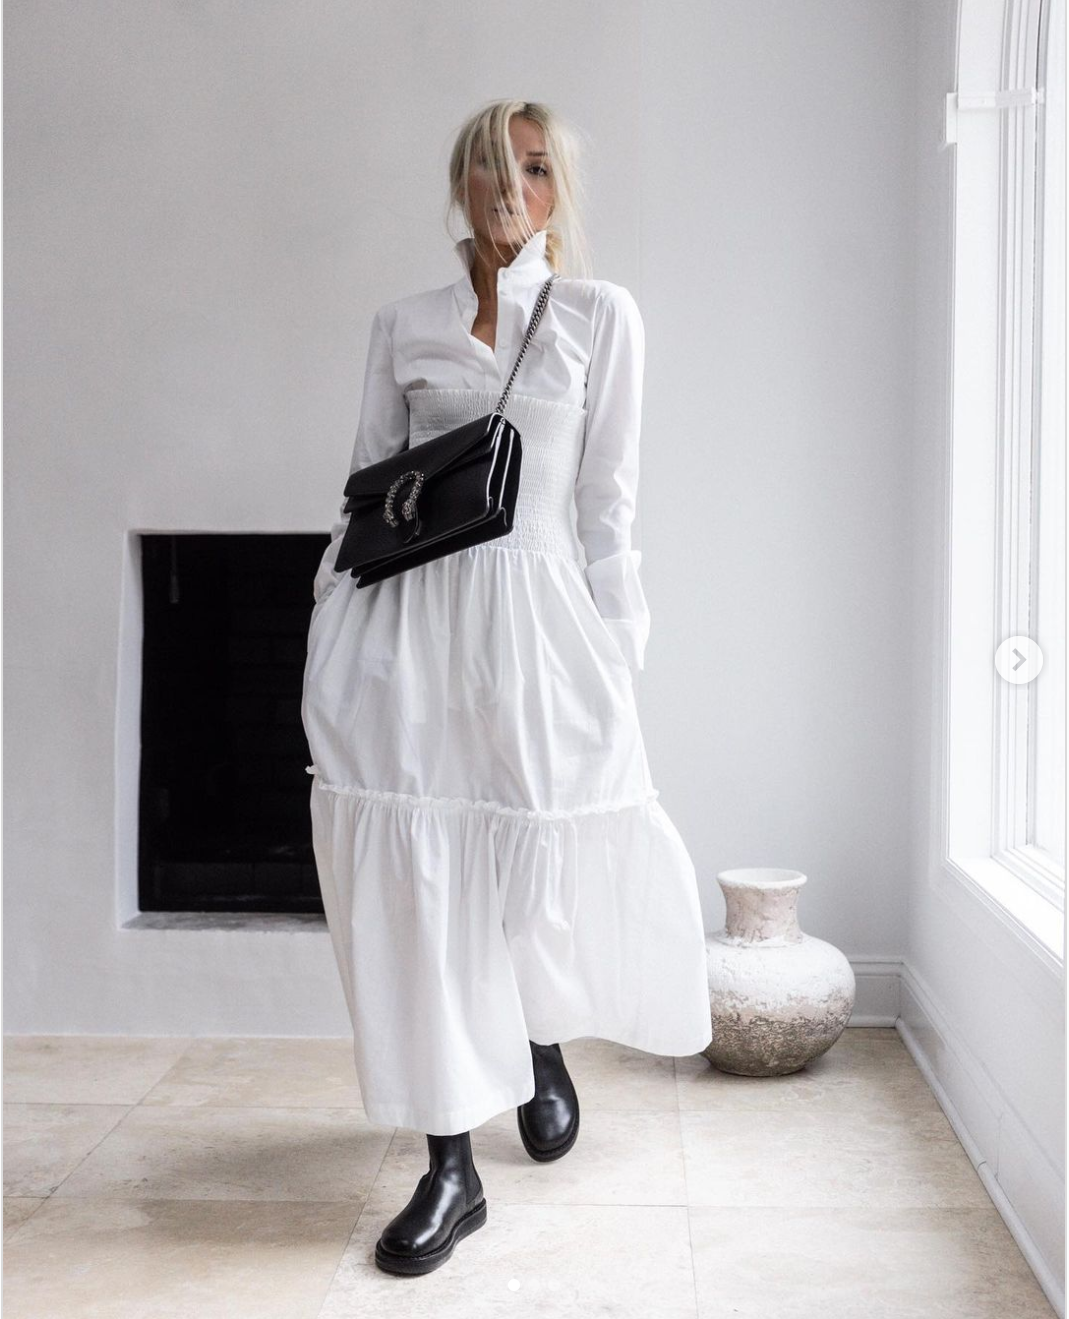
It’s time once again to scour the interwebs for the best, most unique, style icons out there. Today’s style icon is Michaela Babuskova of FIGTNY. This icy blonde is firmly committed to her black and white color palette, which pervades her clothing but also her home decor. Michaela loves a crisp white piece with a loose silhouette:

She is also a great source of inspiration for elevated athleisure looks - see for example the below looks where she mixes (1) a relaxed blazer with loose white pants and sneakers, and (2) a T-shirt with shoulder pads paired with joggers and sneakers.

So what strikes me after looking at FIGTNY’s style?

  1. Cozy fabrics such as sweater knits, fleece and wool can’t change the world outside, but they can make us all feel more comfortable while we’re all forced to stay home.

  2. Even sweat pants can be elevated with the addition of a shoulder padded tee or a blazer.

  3. Flouncy white cotton dresses might be my new style crush.

For today’s challenge, I decided to steal Michaela’s idea of adding shoulder pads to my basic white t-shirt. This was pretty easy - I just folded the sleeves in and stitched the shoulder pads in place. I will post a video tutorial on how to do this next week. Next step: nailing the pose that Michaela struck in her photo, which was super hard and left me with sore legs…

With linen curtain backdrop + vignette + spot retouching.jpg

RuPaul would be disappointed in my inability to serve face. While I work on that, tell me: what do you do to elevate your athleisure looks? Have you tried sewing shoulder pads into your t-shirts?

Translating the Trends: Cropped Cardigan Sets

Disclosure: This post may contain affiliate links and I may earn a small commission when you click on the links at no additional cost to you. I only recommend products I would use myself and all opinions expressed here are my own.

Now that we are officially in sweater season, my thoughts have been turning to that late 90s standby, the cardigan set. I’m not talking about the frumpy twin sets from the 1950s - the latest incarnations of the cardigan set are sexy and body conscious, as exemplified by Katie Holmes wearing a cardigan-and-bra set from Khaite:

I loved the slouchy, louche look of the piece but promptly forgot about it as I don’t have many opportunities in my life to wear a cashmere bra.

But then cardigan sets intruded on my consciousness yet again in the form of this Rosie Assoulin sweater set, which consists of a cropped tank top and cropped cardigan/bolero/shrug that can be worn on or off the shoulders:

Rosie Assoulin sweater set.PNG
Rosie Assoulin sweater set on models.PNG

I tried to ignore its siren call, asking myself where exactly I intended to wear a sweater tank top and cropped cardigan (answer: nowhere). But its charms kept turning in my mind - it’s a convertible sweater that can be worn five different ways! It reminds me of a sweater set I used to rock back in high school! I can wear it with my new bootcut jeans while lounging on the couch! On the other hand, my practical side reminded me that this sweater set retails for an eye-watering $750. I tried to justify the price, telling myself that if I wore it 100 times, it would only cost $7.50 per wear, but ultimately, I just could not bring myself to drop that much money on a sweater, no matter how much I loved it.
Luckily, it is possible to make a DIY cropped cardigan set for a fraction of the price using McCall’s 8003. McCall’s 8003 is drafted as a one-piece top with a yoke, but it could be broken out into two pieces (a cropped tank top and cropped cardigan/bolero/shrug) pretty easily.

McCall’s 8003, VIew A

McCall’s 8003, VIew A

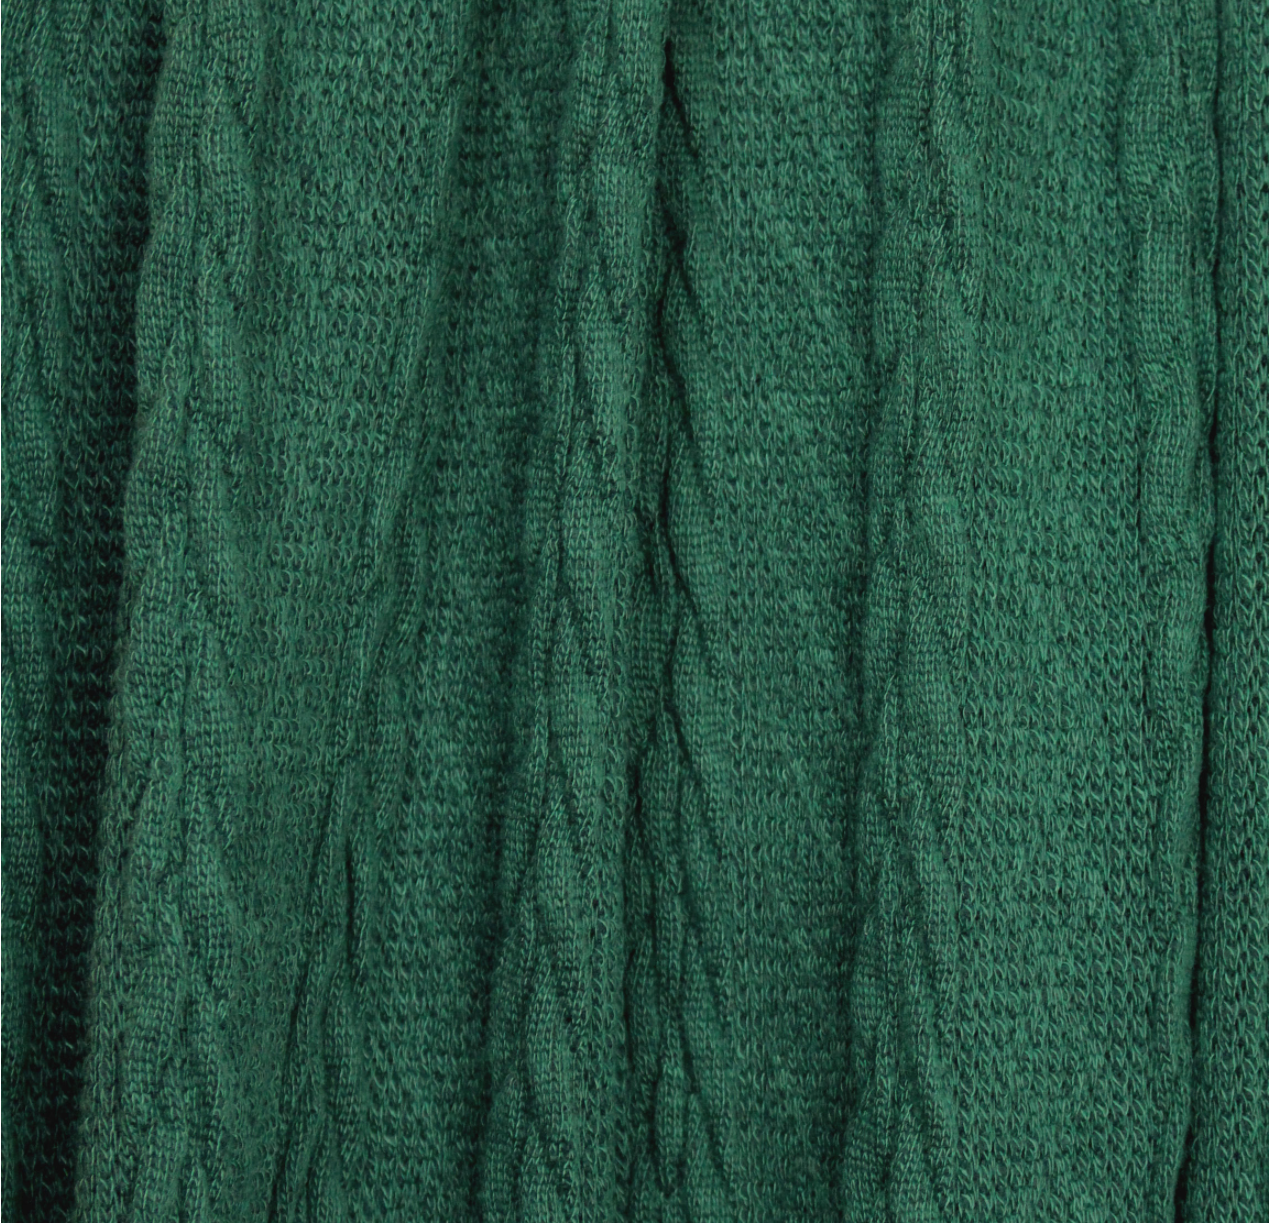
Emma One Sock has some gorgeous cable sweater knit fabrics that I think would be perfect for this:

I’ve ordered the fabric swatches and can’t wait to get started!

UPDATE: I made this cropped cardigan set by refashioning an old sweater and using McCall’s 8003. Check it out here.